
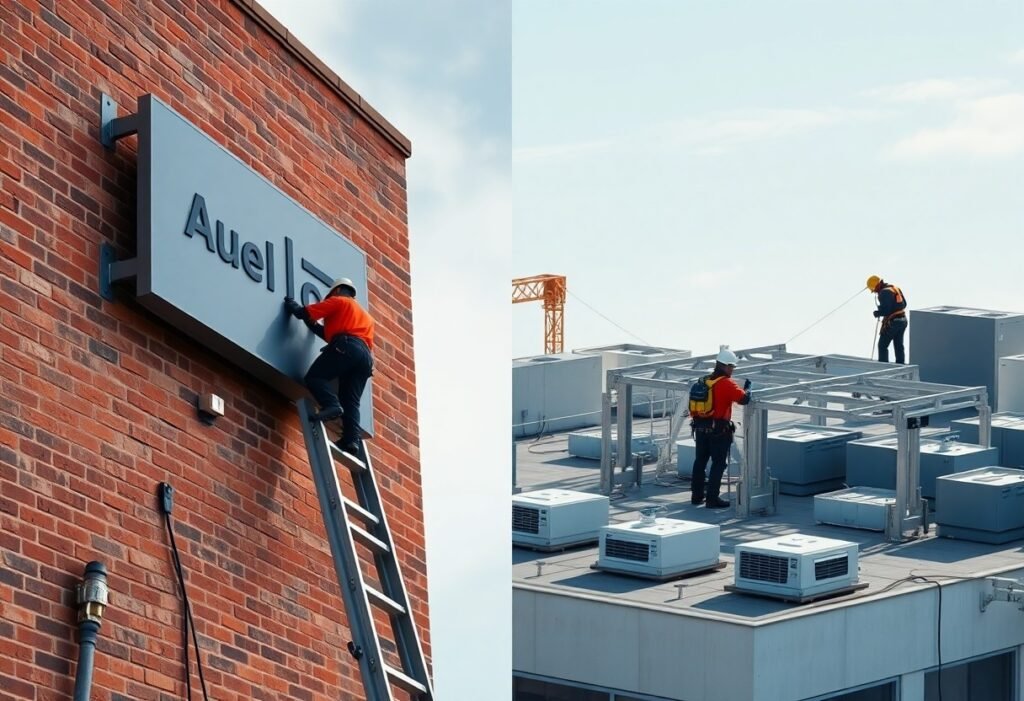
You need clear guidance when choosing between wall mount and roof mount signs; this post explains installation differences – attachment methods, structural reinforcement, wind load considerations, permit and inspection requirements, access for maintenance, and cost implications – so you can select the safest, code-compliant, high-visibility option for your property.
Key Takeaways:
- Mount type: Wall-mounts attach to vertical facades; roof-mounts secure to roofing structures or parapets and use different brackets and anchor points.
- Structural & wind loads: Roof mounts require assessment of roof framing, uplift, and snow loads; wall mounts require checking wall bearing capacity and lateral load anchoring.
- Permits & codes: Local zoning, building codes, and fire regulations often differ for roof vs wall signs; rooftop signs commonly trigger additional structural review.
- Installation & safety: Roof installs need roof access planning, fall protection, and watertight flashing for penetrations; wall installs focus on safe rigging, lifts, or scaffolding and façade protection.
- Maintenance & wiring: Roof signs can be harder to access and increase leak risk from penetrations; wall signs simplify conduit routing but may impact façade finishes and require reinforcement.
Overview of Wall Mount Signs
When you choose a wall-mount sign, you get a direct-facing, space-efficient solution that attaches to vertical façades; common materials are aluminum, acrylic, and PVC with sizes typically from 12″x18″ up to 6’x12″. Installations usually anchor to studs or masonry with stainless fasteners, and illuminated variants provide 24/7 visibility. You’ll find them on retail fronts, office suites, and wayfinding runs where a flush profile and lower wind exposure reduce structural demands.
Definition and Purpose
You use wall-mount signs to display branding, identify entrances, and guide visitors while keeping the sign plane parallel to the building face; they prioritize legibility at sidewalk or curb distance. Manufacturers size panels from small plaques to multi-panel façades; illuminated cabinet and channel-letter options increase night visibility and drive extended-hour recognition for stores and clinics.
Types of Wall Mount Signs
Channel letters, flat-faced panels, illuminated cabinets, projecting blade signs, and digital LED panels are the main types; channel letters often range 6-36″ tall, blade signs extend 24-48″ from the wall, and LED panels can refresh content every few seconds. You should match type to viewing distance, mounting substrate, and local sign codes to maximize impact and compliance.
- Flat panels: lightweight, cost-efficient, ideal for close-range storefronts.
- Channel letters: high-impact, individually mounted, require backbox or chase for power feeds.
- Illuminated cabinets: good for broad illumination and large-copy areas.
- Projecting (blade) signs: improve visibility along pedestrian routes.
- Thou must verify anchor spacing and wind-load ratings before mounting.
| Flat panel | Typical 1/8″-1/2″ substrate, 12″x18″ to 6’x12″, surface-mounted with Z clips |
| Channel letters | 6″-36″ tall letters, individually wired, require routed backing or raceway |
| Illuminated cabinet | Aluminum frame with acrylic face, common sizes 2’x4′-6’x12′, internal LED arrays |
| Projecting blade | Extends 24″-48″, mounted on lateral brackets, ideal for pedestrian sightlines |
| Digital LED panel | Programmable, 500-10,000 nits brightness, often requires additional structural support |
For installation planning you should factor substrate type, sign weight, and electrical needs: a 4’x2′ illuminated cabinet typically weighs 25-60 lbs and can be installed in 2-4 hours by a two-person crew, while channel-letter runs with power feeds take longer and may need licensed electrical work. You’ll also compare maintenance cycles-LED modules often last 50,000+ hours-and check local permit lead times, which can be 1-6 weeks.
- Match material to exposure: aluminum resists corrosion in coastal zones.
- Confirm electrical access and conduit routing before ordering.
- Specify UV-stable inks for long-term color retention on faces.
- Arrange engineered anchorage when wind zones exceed basic ratings.
- Thou include a maintenance plan for LEDs and lens cleaning.
| Visibility | Channel letters or LEDs for long-range; panels for storefronts |
| Cost | Flat panels lowest, channel letters mid, digital highest |
| Installation time | Panels 1-4 hours; letters or digital 4+ hours plus electrical |
| Maintenance | Panels minimal; LEDs require periodic module replacement |
| Best use | Wayfinding: flat panels; branding: channel letters; dynamic messaging: digital |
Overview of Roof Mount Signs
You deal with roof-mount signs when visibility above street level matters most; they sit on parapets, flat roofs, or raised frames to project branding across long sightlines. Many installations require engineered wind-load calculations (often 90-150 psf in exposed areas), specialized brackets, and coordination with roofing membranes to prevent leaks, so you’ll coordinate structural and roofing trades early in planning to avoid costly retrofits.
Definition and Purpose
You use roof-mount signs to maximize sightlines for highways, plazas, and dense urban corridors where wall signs aren’t visible; they serve directional, brand-identification, or advertising roles. Typical heights range from 1.5 m to 6 m above the roofline, and illuminated roof signs often include LED modules consuming 50-300 W depending on size, so you must weigh visibility against power and maintenance access.
Types of Roof Mount Signs
You’ll commonly encounter rooftop billboards, cab-style illuminated boxes, backlit channel letters on frames, neon/LED script signs, and freestanding pylons anchored to roof decks; each requires different structural support and electrical routing. For example, channel letters on a steel frame may need 3-6 anchor points per letter in high-wind zones, and rooftop cabinets often include internal ladder access for service.
- Rooftop billboard: large-format faces for highways and long-range visibility.
- Illuminated cabinet: weather-sealed boxes with LED arrays for even daytime/nighttime legibility.
- Channel letters on frames: formed letters mounted to structural frames above parapets.
- Neon or LED script: lightweight, high-contrast branding elements for skyline impact.
- After you install, perform anchor torque checks, electrical testing, and a roof membrane inspection to ensure watertight integrity.
| Type | Typical Use / Notes |
| Billboard (hoarding) | Long-range advertising; requires large subframe and wind bracing |
| Illuminated cabinet | Retail or hotel ID; demands weather sealing and service access |
| Channel letters | Brand names with depth; mounted on steel support frames |
| Neon/LED script | Skyline accents; lightweight but needs secure anchorage and conduit |
You should evaluate span, uplift, and access when choosing a roof sign type: a 4 m × 2 m cabinet may need a 6-point roof-anchor pattern and a 1.5 kN/m uplift rating in coastal zones, while a 12 m billboard will require engineered guying or moment frames. Also inspect rooftop service paths-if you can’t provide safe ladder or catwalk access, maintenance costs will rise and uptime will decline.
- Plan structural load tests and verify local wind-speed maps (ASCE or local code) before procurement.
- Coordinate electricians for GFCI-protected circuits and emergency shutoffs adjacent to access points.
- Schedule roofing contractor review to integrate flashing and membrane penetration details.
- Confirm fall-protection anchor points for ongoing maintenance and compliance.
- After final sign commissioning, document as-built anchors, torque readings, and maintenance intervals for your asset records.
| Consideration | Action/Specification |
| Wind load | Specify design pressures (e.g., 120-150 psf for exposed sites) |
| Roof penetration | Use flashing boots and curb-mounted bases to protect membrane |
| Electrical | Run dedicated circuits with surge protection and local disconnects |
| Access | Provide ladders, catwalks, or fall-arrest anchors for service |
Key Differences Between Wall Mount and Roof Mount Signs
In practice, you choose wall mounts for close-range, pedestrian-facing visibility and tighter attachment to façade studs or masonry, while roof mounts target long-range sightlines by elevating your message above streetscape clutter. Wall signs usually measure under 50-100 sq ft and favor through-bolts or bracket arms; roof signs frequently require engineered base plates, wind-load calculations and crane lifts for assemblies that can exceed 100 sq ft and sit 20-100+ ft above grade.
Installation Techniques
When installing, you rely on substrate-specific anchors: sleeve or chemical anchors for concrete, lag screws into reinforced studs for wood, and welded base plates on steel decks; roof mounts often need through-bolting into structural members or parapet clamps plus sealed flashing to prevent leaks. You must run wind-load and uplift calculations (per local code or ASCE 7), secure an engineer’s stamp for larger signs, and plan for lifts/cranes and safe access for maintenance.
Visibility and Impact
You judge legibility by letter height-use the rule of thumb of about 1 inch of letter per 10 feet of readable distance (a 12″ letter ≈ 120 ft visibility). Wall mounts excel for sidewalk-level audiences and storefront alignment, whereas roof mounts clear obstructions for drivers and distant viewers, so choose based on typical viewer distance, sightlines, and night illumination strategy.
For example, increasing letter height from 6″ to 12″ extends readable distance from ~60 to ~120 feet, which can change whether drivers on a 35 mph road see your sign in time to react. You should also factor in contrast, font width, backlighting or halo illumination for night visibility, and local zoning setbacks or sign-area caps that may limit whether a roof or wall solution gives the impact you need.
Pros and Cons of Wall Mount Signs
Wall-mount signs give you street-level impact with lower upfront costs and simpler anchoring; you often save 20-40% versus rooftop installs and avoid complex roof penetrations. However, they work best within 100-200 ft of the viewer, and local façade rules or historic-district restrictions can limit size or illumination, affecting placement and effectiveness.
| Pros | Cons |
| Lower installation cost (typically 20-40% less than roof mounts) | Limited long-distance visibility (best within ~100-200 ft) |
| Quicker permit turnaround in many cities (2-6 weeks) | Façade structural limits can cap sign size |
| Smaller crew and shorter install time (2-4 people, hours) | May require reinforcement for signs >25-40 sq ft |
| Easy maintenance access from ground or single ladder | Visibility blocked by street trees or adjacent buildings |
| Greater pedestrian-level engagement for storefronts | Historic districts often restrict drilling/illumination |
| Wide material options (metal, acrylic, routed foam) | Smaller maximum branding scale than rooftop solutions |
| Lower wind-load exposure than rooftop signs | Sign clutter on busy façades can reduce impact |
| Often easier electrical access for illumination | Illuminated signs may trigger stricter electrical inspections |
Advantages
You get cost-efficiency and speed: a standard 6’×3′ illuminated wall sign typically installs in 4-8 hours with a 2-4 person crew and costs approximately $500-$2,000 installed depending on materials; approvals in municipalities like Portland or Denver often close within 2-4 weeks, letting you go to market faster.
Disadvantages
You may face practical limits on reach and size: wall signs generally serve passersby within 100-200 feet, so businesses on wide arterial roads or set back from sidewalks often need additional roadside or rooftop signage to capture distant traffic.
More specifically, many jurisdictions require a structural review for wall signs over about 25-40 sq ft or above certain weight thresholds, and historic façades frequently prohibit invasive anchors-forcing you to use cantilevered brackets or surface-mounted frames. Coastal locations accelerate corrosion, often necessitating replacement or refinishing every 2-5 years, and restrictive local codes can limit brightness, animation, or overall area, impacting your branding strategy.
Pros and Cons of Roof Mount Signs
You’ll gain high-altitude visibility and large-format options with roof-mounted signs, often readable by motorists from 200-500 m, but you must factor in structural engineering and local codes; consider clamp systems to avoid roof penetrations-see Roof Mounted Signs | Wall Mounted Signs for hardware examples and installation approaches.
Pros and Cons of Roof Mount Signs
| Pros | Cons |
|---|---|
| Maximizes visibility for highway or multi-lane traffic | Higher structural and wind-load design requirements |
| Allows much larger sign faces than wall mounts | Often requires roof penetrations or reinforcement |
| Better sightlines over street-level obstructions | Installation and engineering costs are higher |
| Can use no-penetration clamp systems on metal roofs | Access for maintenance is more complex and costly |
| Useful for big-box, malls, and campuses needing long-range ID | Subject to zoning, height limits, and tenant lease restrictions |
| Potentially fewer ground-level obstructions and vandalism | May void roof warranty if not installed per manufacturer specs |
Advantages
You get superior long-range exposure-many retailers report 20-40% higher visibility from elevated signs-because you can install larger faces and position them above clutter; in addition, using modern clamp systems on standing-seam metal roofs often removes the need for penetrations, reducing leak risk and speeding installation.
Disadvantages
You face greater upfront costs, more demanding structural engineering, and stricter permitting: rooftop signs frequently require an engineer’s stamp, wind-load calculations per ASCE standards, and may trigger building upgrades, all of which add time and expense compared with wall mounts.
In practice, expect small rooftop sign installs to start near $800-$3,000 for simple assemblies, while large structural signs can exceed $10,000 once design, roof reinforcement, cranes, and electrical are included; also verify your roof warranty and tenant lease, since penetrations or added loads without manufacturer-approved methods can lead to denial of future roof claims.
Best Practices for Installation
Start with a site survey and engineered drawings: have a structural engineer verify roof or wall load capacity and confirm wind loads per ASCE 7; permits typically take 2-6 weeks. Use drill templates and level laser lines, space primary anchors roughly 24-36 in on large frames, seal all penetrations with marine-grade silicone, and torque fasteners to the manufacturer’s spec (often 30-100 ft·lb). Test with a pull load or proof test before finalizing.
Tools and Materials
You should stock an SDS hammer drill, impact driver with torque settings, torque wrench, laser level, scaffold or boom lift, and fall-arrest gear. Use 304 or 316 stainless fasteners, expansion anchors for masonry, through-bolts for steel, neoprene washers for waterproofing, and zinc- or hot-dip-galvanized steel brackets for corrosion resistance. Bring spare anchors, sealant, and vibration-damping pads for high-wind sites.
Safety Considerations
You must implement fall protection (anchor points, harnesses, lanyards) when working above 6 ft and follow OSHA or local requirements; verify overhead power-line clearances and call utility locate before drilling. Assign a competent person to supervise rooftop tie-off, inspect scaffolding daily, and limit single-person lifts for signs over 50 lb-use a lift or crane for heavy panels to avoid twist hazards and roof membrane damage.
Additionally, perform a job hazard analysis before work begins: document rescue procedures, maintain a 10 ft minimum clearance from live conductors, and ensure weather limits (no installs in sustained winds over 20-25 mph). Log each anchor’s torque and proof-test result, keep a copy of the engineer’s load calculations on site, and schedule a post-install inspection at 30 and 180 days to check fastener tension and seal integrity.
Summing up
Summing up, you should choose a wall-mount when you need lower cost, easier installation and maintenance, and attachment to a load-bearing façade; choose a roof-mount when you need greater elevation and street visibility despite higher structural work, wind bracing, and permit requirements; base your decision on building capacity, visibility goals, budget, and long-term maintenance access.
FAQ
Q: What are the main differences between wall-mount and roof-mount sign installation?
A: Wall-mount signs attach directly to a vertical façade and transfer loads into the building’s exterior wall; roof-mount signs sit on top of the roof structure or parapet and transfer loads into roof framing or a dedicated frame. Wall mounts typically require anchoring into masonry, steel studs, or framed walls and are limited by available wall area and sightlines. Roof mounts need a structural assessment for wind uplift, snow loads, and roof penetration details; they often require a steel support frame, ballast or through-deck anchors, and careful water-proofing at penetration points.
Q: How do engineering and structural requirements differ between the two?
A: Wall-mounts demand load calculations for point loads and shear on the wall substrate, checking for studs, masonry capacity, or required reinforcement. Roof-mounts require analysis of uplift, overturning moments, and distributed loads on roof joists or purlins; they may need a certified structural engineer to design a support frame and flashing details to maintain roof integrity. Both installations must consider wind speed, exposure category, seismic forces (where applicable), and the building’s material and age when specifying anchors and fasteners.
Q: Which mount type offers better visibility and when should each be used?
A: Roof-mounts generally provide greater long-distance visibility and skyline presence, making them suitable for large properties, highway-facing sites, or when the building facade is obscured. Wall-mounts are better for pedestrian-scale visibility, storefront branding, and locations where roof access or structural support is limited. Decision factors include target audience distance, sightlines from approach routes, available mounting area, and local height restrictions.
Q: How do cost, installation complexity, and ongoing maintenance compare?
A: Wall-mount installations are often less expensive and faster when the wall substrate is adequate; they typically require fewer structural modifications. Roof-mounts are more costly due to frame fabrication, structural engineering, roof penetrations, and safety measures for roof work. Maintenance for roof signs can be more complex and expensive because of access, weather exposure, and potential roof repairs; wall signs are generally easier to service but may still require scaffold or lift access depending on height.
Q: What permits, code issues, and best-practice steps should I follow for each mount type?
A: Obtain local sign permits and building permits; submit engineered drawings showing loads and attachment details for both types when required. Check zoning setbacks, height limits, electrical permits for powered signs, and historic-district or HOA restrictions. For roof-mounts confirm roof-load capacity, waterproofing and flashing details, and compliance with fire and egress codes. Engage a structural engineer and licensed sign contractor, provide proof of insurance, and schedule inspections for anchors, electrical work, and final attachment before energizing illuminated signs.