
With a typical channel letter installation, you should plan for your site evaluation and permitting (1-2 weeks), fabrication (2-3 weeks), electrical and mounting prep (1 week), and final installation and inspection (1-2 days to 1 week), totaling roughly 4-6 weeks depending on permit speed, fabrication complexity, and site access; you can shorten timelines by preparing permits early, choosing off-the-shelf designs, and coordinating electricians and installers in advance.
Letter sign installations typically follow a predictable schedule: design approval, fabrication, permitting, site prep, electrical hookup, and final inspection. You can expect a timeline of one to four weeks for standard channel letters, longer when permits or custom work are involved. Your project manager should provide milestones and coordinate installers to minimize disruptions, and you should prepare site access and power details in advance to keep the schedule on track.
Key Takeaways:
- Permitting and approvals typically take 2-8 weeks, varying widely by jurisdiction and review complexity.
- Design, engineering and shop drawings generally require 1-2 weeks, longer if structural or specialized electrical review is needed.
- Fabrication usually takes 2-4 weeks depending on complexity, materials, and lighting options; rush jobs may shorten this.
- Site prep and installation can be 1-3 days for a single sign but 1-2 weeks for multiple signs, rooftop installs, or when cranes/scaffolding are required.
- Final inspections and commissioning add 1-2 weeks; adverse weather, site access, and permit delays are common causes of timeline extension.
Key Takeaways:
- Design, site survey and permitting often take 1-3 weeks, longer if local permits are slow.
- Fabrication typically requires 2-4 weeks depending on complexity, materials and LED lead times.
- Electrical work, power coordination and any required engineering reviews add 1-2 weeks.
- On-site installation ranges from a single day for small signs to 1-2 weeks for multiple or large assemblies; access and weather affect timing.
- Final inspection, testing and commissioning usually take 1-7 days – overall project timelines commonly span 4-10 weeks.
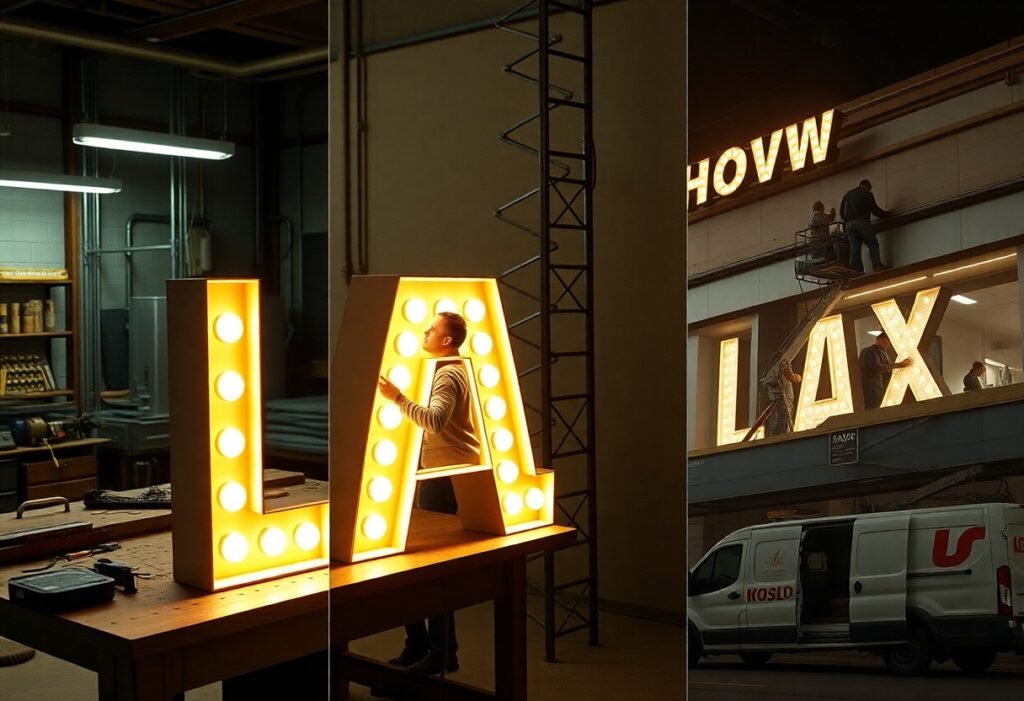
Understanding Channel Letters
You’ll encounter channel letters as three-dimensional signage components built from aluminum returns and acrylic or polycarbonate faces, typically 3-6 inches deep and 8-72 inches tall. Most use LED modules rated ~50,000 hours; common face thickness is 1/8-3/16 inch. You can choose raceway mounting for quicker installs or stud-mounts for a flush look, and letters over 48 inches or large sign areas often trigger engineering review and permitting.
What are Channel Letters?
Channel letters are individual, dimensional characters fabricated from metal returns and formed faces that may be illuminated or non-illuminated; you’ll see them on storefronts, malls, and wayfinding. Typical construction uses 0.040-0.063 inch aluminum, acrylic faces, and LED arrays placed inside or behind the face. Installation methods include raceway, stud-mount, or internal wiring with junction boxes, and larger letters usually require structural anchoring and electrical permits.
Types of Channel Letters
Face-lit, reverse/halo, open-face (exposed LED), neon-style, and hybrid front-back letters cover most options, each varying by illumination pattern, return depth, and fabrication cost. For example, halo letters typically need 2-4 inches clearance from the wall for an even glow, while open-face letters often use 3-4 inch returns and visible LED strips for impact. Knowing which style best meets your visibility, maintenance, and budget requirements guides fabrication and install timelines.
- Face-lit: acrylic front with internal LEDs for direct brightness.
- Halo/reverse-lit: opaque face or metal face, backlight creates a glow.
- Open-face: exposed LEDs for a bold, industrial daytime look.
- Neon-style: glass or LED neon for continuous, warm lines; higher cost.
- Hybrid: combines face illumination with halo effects for layered lighting.
| Face-lit | Direct illumination; 1/8-3/16″ acrylic; common retail choice |
| Reverse/Halo | Opaque face; 2-4″ clearance for halo; elegant night presence |
| Open-face | Exposed LEDs; shallow returns 3-4″; high daytime impact |
| Neon-style | Glass or LED neon; flexible shapes; typically 2-3× cost |
| Hybrid | Face + halo; 4-6″ returns; custom finishes and higher complexity |
You’ll weigh visibility, energy draw, maintenance, and cost when choosing a type: face-lit letters often use 40-60 LEDs per 12″ letter row and consume ~60-120W on large signs, halo-lit needs precision offsets to avoid dark spots, and neon-style can be 2-3× the price of LED builds. Installer crew size typically ranges 1-3 people depending on letter size and mounting method. Knowing these trade-offs lets you set realistic fabrication and install budgets.
- Visibility: face-lit = high; halo = subtle and upscale
- Energy: LEDs low draw (~50k-hour life); neon draws more
- Maintenance: modular LEDs simplify repairs; neon needs specialist
- Cost: LED face-lit common $200-$800 per letter (size-dependent)
- Installation: halo requires precise offsets; stud-mounts often faster
| Visibility | Face-lit: high; Halo: medium but refined |
| Energy Use | LEDs: efficient ~50,000-hour life; neon: higher consumption |
| Maintenance | LED modules replaceable; neon repair specialist required |
| Typical Cost | $200-$800 per letter (size/complexity); neon 2-3× |
| Install Complexity | Stud/raceway simple; halo needs precise offsets and 1-3 installers |
Understanding Channel Letters
What Are Channel Letters?
Channel letters are three-dimensional, custom-fabricated sign characters that combine an aluminum or steel housing with an acrylic face and internal LEDs so your brand is visible day and night; you’ll commonly find them on storefront façades, malls and highway-facing buildings. Typical heights run from 12 inches to over 6 feet, and the construction method you choose affects weight, wiring complexity and permit reviews for your site.
- Housing: forms the letter’s body and protects wiring.
- Face: acrylic or polycarbonate for color and diffusion.
- Lighting: LEDs are standard for low energy and long life.
- Mounting: raceway vs. flush mount determines install time.
- Perceiving how these elements interact helps you plan budget and schedule.
| Component | Purpose |
| Housing | Protects internals; shapes letter depth |
| Face | Provides color, diffusion and front surface |
| Lighting | LED modules for illumination and efficiency |
| Trim cap | Seals face to housing and refines appearance |
| Mount | Determines attachment method and structural load |
Types of Channel Letters
You’ll encounter front-lit, back-lit (halo), open-face, reverse-lit and combination channel letters; front-lit is the most common-about 60% of installs-because it offers strong daytime legibility, while halo and reverse-lit styles provide upscale night-time effects. When you select a type, consider how it changes electrical needs, maintenance frequency and the likelihood of additional engineering or permitting for mounting height and wind loads.
- Front-lit: acrylic face with LEDs for direct visibility.
- Halo/back-lit: creates a glow against the wall for depth.
- Open-face: exposed modules for bold, industrial looks.
- Reverse-lit: yields a soft halo for premium branding.
- Perceiving how trade-offs like energy and permits vary helps you match style to site.
| Type | Best Use |
| Front-lit | High daytime visibility for retail |
| Halo / Back-lit | Architectural façades and upscale brands |
| Open-face | Bold, industrial, or low-cost signage |
| Reverse-lit | Elegant halo effect for premium identity |
| Combination | Mixed effects for layered brand messaging |
For planning, factor in average LED lifespans (50,000+ hours), typical fabrication lead times of 2-4 weeks, and that larger letters may require engineering; you should budget extra time if wall penetrations need flashing or structural reinforcement. If you’re subject to a historic district review, expect an additional 4-6 weeks and possible design revisions to match guidelines.
- Electrical: LED drivers often require accessible junctions.
- Fabrication: routing and welding add 1-2 weeks for complex forms.
- Installation: rooftop or high-mount jobs take longer and cost more.
- Maintenance: plan lamp and silicone replacement cycles every 5-10 years.
- Perceiving these scheduling variables up front reduces delays and change orders.
| Consideration | Typical Impact |
| LED lifespan | 50,000+ hours; lowers long-term cost |
| Fabrication lead time | 2-4 weeks standard; complex shapes add time |
| Permits & reviews | 2-8 weeks typical, longer in historic zones |
| Installation complexity | Rooftop/hard-to-access adds labor and hoisting |
| Engineering | Required for large/heavy letters or wind loading |
Pre-Installation Planning
You should budget 1-3 weeks for pre-installation planning to align design, materials, and trades. Coordinate with your electrical contractor and a structural engineer when letters exceed roughly 6 sq ft or 50 lb, and schedule material orders so aluminum returns and acrylic faces arrive 7-10 days before installation. Also confirm access (scaffold vs. lift), staging areas, and weekday vs. weekend install windows to avoid surprise costs or delays.
Site Assessment
During the site assessment you’ll verify mounting substrate, measure elevations and setbacks, and document facade penetrations with photos and scaled elevations. Take exact measurements for letter centers, note wind-load conditions (exposed rooflines often require extra anchors), and confirm available power-120/277V vs. 12/24V LED drivers-so you can avoid last-minute field modifications.
Permitting and Regulations
Permitting typically runs 2-8 weeks depending on jurisdiction and review complexity; permit fees commonly range $50-$600. You’ll need to check zoning, HOA rules, and any historic-district overlays, and plan for an electrical inspection and final sign permit sign-off as part of your timeline.
Expect permit submittals to include scaled elevations, shop drawings, structural calculations for attachments, electrical schematics, and UL listings or LED photometric data. Submit early, allow for 1-2 review cycles (each often 7-14 business days), and coordinate revisions quickly-projects in major cities like Los Angeles or Chicago commonly require additional plan-check steps that can extend total approval time.
Factors Influencing Installation Timeline
Fabrication complexity, permitting, electrical upgrades, site access, and weather all change how long your channel letter install will take. Simple non-illuminated sets often move in 2-3 weeks, while illuminated halo or custom-finished letters typically require 4-8 weeks. You should also plan for crane or lift scheduling and shipping windows. The most frequent delays involve permit reviews, utility coordination, and specialty fabrication lead times.
- Fabrication complexity (lit vs non-lit, custom faces)
- Permitting and municipal review timelines (2-8 weeks)
- Electrical service requirements and utility coordination
- Site access, lifts/cranes, and staging availability
- Weather and seasonal contractor availability
- Landlord or franchise approval processes
Site Assessment
During a site assessment you or your contractor verify wall construction, exact dimensions, and mounting points-typically a 30-90 minute visit. You should confirm electrical capacity (120V vs 277V), existing conduit, and any NEC or structural-engineering requirements; if an engineer inspection is needed, add 3-7 business days for drawings. Photos and elevation sketches gathered on-site speed permit submittals and reduce revision cycles.
Design Approval
Design approval usually involves 1-3 revision rounds between you, the sign shop, landlord, and franchise or brand team, with each round taking 2-10 business days. You’ll need scaled mockups, front elevations, and Pantone or RAL specifications for color matching; sometimes physical samples or light-tests are required. The faster your stakeholders sign off, the sooner shop drawings and permit packets can be finalized.
In many municipalities you must submit stamped shop drawings and structural calculations; if engineering is required, expect an extra 5-10 business days and fees of $300-$1,200 depending on complexity. You might see added time when landlords request physical samples-one chain store project added two full weeks for sample fabrication-and historic-district reviews can tack on 2-4 weeks for compliance.
Installation Preparation
Site prep sets the tone for a smooth install: you should confirm wall substrate and anchor load capacity, clear a 10×15 ft staging area, verify dedicated circuit access, and arrange lift placement. Allocate 1-2 days for wall inspections and structural engineer sign-off on heavy runs over 50 lbs per letter, and coordinate access windows with building management to avoid elevator or loading-dock conflicts.
Materials and Tools Needed
Bring your fabricated letters, mounting rails, M8-M12 wedge anchors, silicone sealant, conduit and junction box, LED drivers (Class 2), 14-16 AWG hookup wire, multimeter, drill/impact, torque wrench, and a 40-60 ft boom or scissor lift. Include spare acrylic faces and at least one spare driver per 10-12 letters to prevent on-site delays and reduce downtime.
Scheduling the Installation
Plan installs on weekdays, ideally 7-11 AM for daylight and lower traffic; small installs (≤10 letters) typically take 3-6 hours with two technicians, while medium storefronts (20-40 letters) require 1-2 days with 3-4 crew members. Reserve 2-3 hours for potential municipal inspections, and confirm noise or access restrictions with property management before the date.
Example: a 48-letter channel at a strip center required two days-day one for mounting rails and electrical rough‑in (three techs, 60‑ft boom, ~6 hours), day two for wiring, sealing and testing (two techs, ~4 hours). You should build a 24-48 hour contingency for weather, inspector availability, or last‑minute permit conditions, and secure parking/crane windows 48-72 hours ahead.
Installation Phases
You’ll move through four predictable phases: pre‑installation preparation, on‑site mounting, electrical hookup, and final commissioning. For a single storefront expect 4-8 hours; multi‑tenant façades or rooftop channel runs often require 1-3 days. Typical on‑site work includes template setup, anchor drilling, conduit routing and LED wiring, with a 2-4 person crew. Weather, lift availability and building access commonly dictate whether you finish in a half‑day or must schedule multiple visits.
Pre-Installation Preparation
You should complete a site survey with measurements to ±1/8″, confirm substrate and anchor types (3/8″ stainless bolts common), verify power source (120V vs 277V) and secure permits and lift rentals. Mock up mounting templates in the shop, pre-wire letter harnesses and label circuits, and stage parts so you reduce on‑roof time. For complex façades, plan load calculations and submit engineering within the 2-8 week permitting window.
Actual Installation Process
You’ll align and secure the mounting template, drill anchors, install backer plates or rail, feed raceways and pull pre-labeled harnesses through, then fasten channel returns and faces. After sealing seams with neutral‑cure silicone, connect each letter to the junction box, install a photo sensor/dimmer and perform a sequential power‑on. A medium 10-12 letter sign typically takes a 3‑person crew 4-8 hours, including testing and cleanup.
For more detail, expect lift selection to affect timing-boom lifts for offsets, scissor lifts for flat façades-and wind limits (often 20-25 mph) to pause work. Use torque specs for anchors and shim misaligned letters; perform a 24‑hour burn‑in to catch failed LED modules and measure uniformity (aim for ±10% across letters). Coordinate a final walkthrough with the building rep and supply as‑installed wiring diagrams and photos for sign-offs.
The Installation Process
Once permits are issued, your install day typically follows a tight timeline: layout and template placement (30-90 minutes), mounting hardware installation (1-3 hours depending on substrate), wiring and power hookup (1-4 hours), and final testing plus cleanup (30-60 minutes). For a 10‑letter storefront with a 3‑person crew expect 6-8 hours; multi‑day projects expand with crane lifts, structural tie‑ins, or complex electrical feeds.
Mounting Techniques
You’ll choose raceway mounting, direct‑to‑wall studs, or z‑channel standoffs based on substrate and letter depth. For concrete use 1/2″ wedge anchors or epoxy studs; for hollow CMU or metal studs use toggle anchors or backing plates. Raceway mounts simplify wiring but add weight; direct mounts deliver a flush look yet demand precise hole alignment. A 12‑letter run typically takes 4-6 hours to set with a 3‑person crew when access and anchors are straightforward.
Wiring and Electrical Connections
For power, you’ll balance 120V line feeds for drivers with low‑voltage LED outputs; common drivers are 12-24V DC, UL‑listed, and normally placed within 10-15 ft to limit voltage drop. Conduit, junction boxes, and GFCI protection must follow local code; a single 15A circuit can handle small installations, while larger runs require multiple circuits or distributed drivers. Plan 1-4 hours for wiring depending on access and electrician availability.
Calculate load by summing driver wattages-letters often draw 5-60 W each depending on size and LED density-and size conductors to keep voltage drop under 3%. For low‑voltage runs under ~50 ft you may use 16-18 AWG; longer runs or higher currents call for 14-12 AWG or running 120V to individual drivers. Always use UL‑listed drivers, torque lugs to spec, ground raceways, label junction boxes, and have a licensed electrician perform final terminations and inspection.
Typical Timeframes
Timelines vary by project scope, but you can expect fabrication to take 2-6 weeks for standard channel letters and 6-12 weeks for complex multi‑face or routed designs; permitting often adds 2-8 weeks, while on‑site mounting and electrical hookup commonly finish within 1-3 days. For fabrication details like returns and backs, consult the Bay Area Guide to Channel Letter Fabrication: Returns and Backs for real‑world examples you can apply to your schedule.
Average Duration for Each Phase
For budgeting, plan 1-3 weeks for pre‑installation planning, 2-6 weeks for fabrication, and 2-8 weeks for permits and inspections. Site prep and access work often take 1-5 days, while on‑site mounting typically requires 1-3 days per storefront; electrical hookup and commissioning usually add a single day. A straightforward project often completes in 4-8 weeks total, while more complex jobs push toward 10-14 weeks.
Variability in Timelines
You should expect wide swings: custom facecuts, powder‑coating colors, or LED backlighting increase fabrication by 1-4 weeks, while city permit backlogs can add several months. Limited access sites, night work, or required electrical upgrades often extend on‑site time from days to weeks. Ordering specialty LEDs or acrylic can introduce 2-6 week supplier lead times that alter the whole schedule.
For example, a storefront in a busy urban center you manage might face a 10‑week permit queue and require night installations across three shifts, turning a planned 2‑day hang into a 1‑week effort; conversely, a rural tenant improvement with existing permits can be done in 7-10 days. In practice, build contingency of 20-30% into your timeline and confirm supplier lead times to avoid last‑minute schedule slips.
Post-Installation Steps
Once the letters are mounted and powered, you should complete final paperwork, schedule a 7-14 day site walk, and hand over as‑built drawings plus a maintenance plan; also verify final inspection sign‑off with the AHJ. Consult The Do’s and Don’ts of Installing Channel Letter Signs on storefronts for common post‑install pitfalls and warranty handover examples.
Quality Assurance
You should test every channel letter for continuity, voltage and uniformity-measure supply at 110-120VAC and LED boards at their specified 12-24V, and use a light meter to confirm ±10% brightness consistency. Log test results and take night‑photo evidence, then have the client sign the acceptance form; a typical 20‑letter job takes 1-2 hours for full QA and documentation.
Cleanup and Final Touches
You should remove all scaffolding and debris, seal wall penetrations with a UV‑rated silicone, touch up paint around mounts to match the façade, and clean acrylic faces with a non‑abrasive cleaner; leave labeled transformer locations and a maintenance sheet for your client.
Additionally, inspect mounting hardware torque (typically 18-25 ft‑lb for M8 anchors), recycle scrap metal and packaging, and verify that all access panels lock. Plan cleanup to add 1-3 hours and $50-$200 to final costs on most installs, and schedule quarterly LED checks for the first year to catch early failures.
Common Delays and Challenges
Delays often stack when site, fabrication, and approvals collide, turning a planned 2-3 week install into several months; you’ll face week‑long weather holds, 2-8 week permit reviews, and unexpected utility upgrades that add 1-3 weeks. Track each item with a buffer, order long‑lead components early, confirm utility schedules, and set interim milestones so one setback doesn’t derail the entire timeline.
Weather-Related Issues
Severe weather stops hoisting above roughly 25-30 mph and forces electricians off ladders during storms, so you may lose several days per event; extended rain or high humidity can demand 24-72 hours of dry conditions for sealants and LED adhesive cures. Plan installs in drier seasons when possible, and build 3-7 day contingency windows for regional storm patterns.
Regulatory and Permitting Delays
Permitting frequently creates the largest hold‑ups: municipal plan reviews typically take 2-8 weeks, while HOAs or historic districts can add 4-12 weeks for design approval or variances. You’ll need stamped structural drawings, electrical permits, and sometimes photometric reports; a single missing document triggers resubmittals that push your install schedule out by weeks.
Common resubmittal reasons include incorrect elevation details, absent channel‑letter mounting specs, or unspecified lumen outputs; many jurisdictions insist on a structural engineer’s stamp for façade‑mounted letters and limit inspections to set weekdays, which can delay final sign energizing. To shorten reviews, submit a complete permit package, hold a pre‑application meeting, or hire a local expeditor-these tactics often shave one to three weeks off the review cycle.
Common Installation Timeframes
Installation windows vary by project size and site conditions; small storefront sets often finish in a single working day, while multi-face or rooftop installs can span several days. You should expect on-site work to include layout, mounting, electrical tie-ins, testing and cleanup, with typical on-site times ranging from 4 hours for a few letters to 3 days for complex configurations.
Factors Affecting Installation Time
Major variables change your schedule quickly:
- Permitting and inspection queues at the municipality
- Site access and staging for lifts or cranes
- Electrical complexity and required disconnects
- Weather delays for exterior hoisting or rooftop work
- Mounting surface condition and any structural reinforcement
Recognizing which of these is the bottleneck lets you plan contingencies and communicate realistic timelines to stakeholders.
Typical Durations for Various Types
Common on-site durations typically fall into predictable ranges:
- Face-lit letters: 4-8 hours for a small storefront set
- Reverse/halo-lit letters: 1-2 days depending on alignment and wiring
- Raceway-mounted strings: 2-6 hours for a single run
- Rooftop or high-elevation installs: 1-3 days due to rigging and safety setup
Knowing these ranges helps you allocate crews, lifts, and inspection windows efficiently.
| Channel Letter Type | Typical On‑Site Install Time |
|---|---|
| Small face‑lit storefront (≤10 letters) | 4-8 hours (single day) |
| Medium set (11-30 letters, mixed types) | 1-2 days |
| Large sets (>30 letters) or multi‑face | 2-4 days |
| Rooftop/high‑elevation installs | 1-3 days (plus lift/crane time) |
| Custom/complex electrical or structural work | Variable – add 1-5 days |
For planning accuracy, break examples into concrete scenarios:
- 10-letter retailer on a single raceway: typically completed in one day
- 25-letter mall façade with mixed cabinet types: often 1-2 days
- Roof-mounted 12‑piece sign requiring crane: schedule 2-3 days including rigging
- Sign with on-site welding or shimming: factor in an extra day
Knowing these scenario-based timelines lets you coordinate permits, electrical shutdowns, and tenant schedules without surprises.
Best Practices for Efficient Installation
You should standardize pre-fabrication, staging, and permit pulls to cut onsite time; pre-fab often reduces installation labor by up to 40%. Conduct a thorough site survey, confirm electrical drops, and schedule inspections around permit windows to avoid delays. When you sequence work-site prep, mounting, electrical hookup, and final testing-you can typically compress a 10-14 day project into 4-7 days of active fieldwork.
Planning and Coordination
When planning, build a Gantt-style schedule that includes material lead times: acrylic faces (2-4 weeks), LED modules (1-3 weeks), and transformers (1-2 weeks). Coordinate with the electrician for 240V drops, structural engineer for anchor points, and secure crane or lift for 2-3 days. Allow 7-21 days for permit review and book inspections in advance so you avoid idle crews and last-minute rushes.
Hiring the Right Professionals
Hire licensed sign contractors with at least five years of commercial channel-letter experience and ensure you verify proof of insurance (general liability $1-2M, workers’ comp) plus an OSHA 10 or 30 training record. Ask for portfolios of similar storefronts, three client references, and confirmation they use UL-listed power supplies and offer typical warranties (for example, 5-year parts).
You should dig deeper by verifying fabrication capabilities (in-house CNC, brake press, powder coat) and material specs – 16-18 ga aluminum or stainless for cabinets. Confirm LED drivers rated 50,000+ hours, clear warranty terms, and willingness to pull permits and coordinate inspections. For example, a downtown retail install finished in four days when a 4‑person crew used prefabricated cabinets and prewired harnesses, versus ten days with on-site fabrication.
Summing up
Taking this into account, you can expect a typical channel letter install timeline to span from two to eight weeks depending on permitting and fabrication complexity; design and permit approval often take one to four weeks, fabrication one to three weeks, and installation one to two days to a week for standard jobs, while larger projects or permit delays can extend your schedule, so you should plan contingency time accordingly.
Summing up
To wrap up, you should plan for a typical channel letter install timeline spanning several weeks: permit approvals and design review (1-4 weeks), fabrication (1-2 weeks), site prep and installation (1-3 days to a week), followed by electrical hookup and inspection (days to a week). Complex sites or permit delays extend this, so schedule buffer time to keep your project on track.
FAQ
Q: What is the typical overall timeline for a channel letter install?
A: Typical channel letter installation projects run from 3 weeks to 12+ weeks from initial order to final inspection. Small, simple signs on a single storefront can be completed in 2-4 weeks, while multi-sign programs, rooftop letters, or work requiring structural engineering and complex permitting commonly take 8-12 weeks or longer.
Q: What are the main phases that determine the timeline?
A: The timeline breaks into site survey and measurement, design and client approvals, permitting and plan review, fabrication, site preparation (scaffolding/crane/anchorage), electrical hookup, and final inspection. Each phase has its own lead time: surveys and design can take 1-2 weeks, permitting 1-8 weeks, fabrication 1-3 weeks, and installation 1-5 days depending on complexity.
Q: How long does permitting and inspections typically take?
A: Permit review times vary widely by jurisdiction. Low-complexity permits in business-friendly municipalities can be issued in a few days to 2 weeks. More restrictive cities or projects requiring structural engineering, historic-board approval, or conditional use permits can add 4-8+ weeks. Scheduling the electrical and building inspector after installation often takes 1-2 weeks depending on local inspection calendars.
Q: What common factors cause delays and how much can they add to the schedule?
A: Frequent delay sources include extended permitting/plan review, missing engineering details, client changes during fabrication, crane or street-closure scheduling, and adverse weather. Each can add days to weeks: permit complications 2-6 weeks, engineering revisions 1-3 weeks, crane or traffic-control windows 1-4 weeks, and weather-related hold-ups can add several days to a couple of weeks during bad seasons.
Q: Can installations be expedited and what options shorten the timeline?
A: Yes-expedited options include pre-approved standard designs, priority fabrication services, arranging temporary power or provisional inspections, night/weekend install crews, and engaging a permit expeditor. Expedited service typically incurs extra cost but can reduce total time by 30-70% depending on which bottlenecks are addressed; realistic fast-track schedules for simple installs are often 7-14 days if permits and site access are already available.