
Installation of a monument sign requires careful planning, proper site preparation, compliant permitting, and secure foundation work to ensure durability and visibility; you should assess local codes, utilities, materials, and electrical needs, coordinate with engineers or sign professionals, and follow best practices for anchoring, drainage, and finishing so your sign reliably represents your property and meets safety and aesthetic standards.
Key Takeaways:
- Site assessment & permits: verify property lines, easements, zoning restrictions, and obtain required permits; perform utility locates before any excavation.
- Foundation & anchoring: design engineered concrete footings sized for soil conditions, frost depth, and wind loads; set anchor bolts and curing time per spec.
- Structural design & materials: use corrosion-resistant framing and finishes, follow engineered plans for wind/snow loads, and specify weatherproof components for longevity.
- Electrical & lighting: plan conduit routing, power source, GFCI protection, and safe access for maintenance; ensure illumination meets local code and glare limits.
- Installation & finish work: coordinate rigging/crane lifts, confirm proper plumb and alignment, allow concrete cure, install drainage/landscaping, and schedule final inspections.
Understanding Monument Signs
Types of Monument Signs
You’ll encounter masonry (brick or stone), precast concrete, aluminum/steel with routed faces, illuminated cabinet signs, and sandblasted wood or composite options; typical dimensions run 2-6 ft tall and 4-12 ft wide depending on sightlines and zoning setbacks. Knowing which type suits soil conditions, wind loads, and maintenance budgets reduces retrofit headaches and permit delays.
- Masonry: durable, premium appearance
- Precast concrete: fast install, heavy base
- Metal/aluminum: sleek, low-profile
- Illuminated cabinet: high night visibility
- Sandblasted wood/composite: textured brand look
| Masonry (brick/stone) | Best for high-end campuses; low upkeep, heavy foundation required |
| Precast Concrete | Cost-effective for uniform campuses; quicker install, high mass |
| Metal/Aluminum | Modern aesthetics; lighter and easier to fabricate for logos |
| Illuminated Cabinet | 24/7 visibility for retail; requires electrical and light maintenance |
| Sandblasted Wood/Composite | Good for rustic brands; needs sealing in wet climates |
Purpose and Benefits
You deploy monument signs to anchor your brand at-grade, improve driver recognition at typical approach speeds of 25-40 mph, and provide a pedestrian-friendly scale where pylons would dominate. For example, neighborhood retail centers often see clearer curb appeal and more immediate wayfinding after installing appropriately scaled monuments.
Choosing durable materials and efficient illumination affects lifetime cost and ROI: LED faces can cut lighting energy by roughly 60-80% versus older fluorescent cabinets, masonry bases minimize yearly upkeep, and correct siting increases visibility from primary access roads while complying with local sight-triangle and setback regulations.
Site Assessment
Begin site assessment by confirming zoning, easements, and utility locates (call 811 in the U.S.). Check setbacks, height limits, and sightlines at driver eye height (3.5-4.5 ft), and obtain traffic counts or AADT to gauge approach speed. Also verify ADA access (36 in clear path) and local permit timelines-some municipalities take 4-8 weeks. Use photos and a scaled site plan to document your existing conditions before design.
Choosing the Right Location
Choose a spot that maximizes visibility from primary approaches while avoiding utility corridors and sightline obstructions. Apply the 1 in : 10 ft rule-each inch of letter height equals about 10 feet of legibility-so if you need 80 ft viewing distance specify ~8‑inch letters. Setbacks typically range 5-20 ft from curb depending on roadway classification; placing your sign 10 ft closer can increase readability and drive‑by impact.
Evaluating Site Conditions
Evaluate soil bearing, groundwater, drainage patterns, and frost depth to size foundations correctly. Typical footings for freestanding monument signs are often 18-36 in deep and 12-30 in diameter, but local frost lines and wind loads governed by ASCE 7 will dictate larger designs. You should check for underground utilities and tree root zones before specifying excavation limits.
Order a geotechnical report when soils are silty, organic, or variable; it provides bearing capacity and recommended footing depths for your project. On coastal or high‑wind sites plan for 90-140 mph design winds and consider stainless hardware and marine coatings. Specify 3,000-4,000 psi concrete with rebar per local code for long‑term durability, and document compaction testing for your backfill.
Design Considerations
When you move from concept to placement, balance proportion, sightlines, and code limits; typical monument heights run 3-6 feet and should complement building scale and landscaping. For practical guidance on foundations and site prep consult Monument Sign Installation. Also factor viewing distance-use the 1″ letter-per-10′ rule-and local setbacks, which often dictate maximum face area and footing depth.
Sign Dimensions and Visibility
You should size letters and face area to match expected viewing range: 1″ of letter height per 10′ of clear sight distance means a 10″ letter for 100′ visibility. Additionally, maintain a clear 3-5′ sight triangle from road edges, keep logos simple above 30% of face area, and choose high-contrast colors and 5-7° face angle for angled approaches to maximize legibility.
Material Selection
You’ll pick materials based on durability, budget, and environment: masonry or precast concrete offers 50+ year life, aluminum or steel runs 20-30 years with coatings, and high-density urethane (HDU) is great for detailed routed faces with a 10-25 year expectancy depending on finish. Coastal sites should prefer marine-grade stainless or powder-coated aluminum to resist corrosion.
Think about long-term maintenance: powder-coat finishes typically need touch-ups every 5-10 years, LED modules are rated ~50,000 hours (about 5-11 years of common usage), and stainless fasteners plus galvanized or concrete-filled footings prevent galvanic corrosion. For cost control, combine a masonry base with replaceable routed aluminum or acrylic panels so you can update branding without rebuilding the structure.
Permitting and Regulations
You must factor municipal sign codes into timing and costs: many jurisdictions set maximum monument heights between 3-8 feet, setbacks of 5-20 feet, and permit review windows of roughly 2-6 weeks. Provide scaled drawings, site plan, and engineered footing details to avoid delays; typical inspections add 1-3 site visits and fees usually range from $50-$500 depending on complexity.
Local Zoning Laws
Different zoning districts – commercial, mixed-use, and residential – impose distinct rules: commercial zones often allow larger sign areas (50-200 sq ft) and taller structures, while residential or historic districts may cap signs at 8-32 sq ft and require materials that match surrounding architecture. You should check overlay districts, setback tables, and any special frontage or visibility triangles that affect allowable placement.
Obtaining Required Permits
Begin by submitting a site plan, elevation, electrical schematic for illuminated signs, and engineered foundation details; many municipalities require a licensed engineer’s stamp for signs over ~4 feet tall or for unusual wind/soil conditions. Anticipate plan review times of 2-6 weeks, factor permit fees and possible bonding into your budget, and schedule inspections early to prevent installation hold-ups.
If the sign encroaches near a public right‑of‑way you’ll likely need an encroachment permit and proof of liability insurance, and installations within 100 feet of a state highway can trigger state DOT approvals. Also obtain HOA architectural approval where applicable, prepare for variance or design‑review hearings if you exceed limits, and confirm electrical inspections and final sign-off to close the permit loop.
Installation Process
After permits are in hand, you sequence tasks to minimize downtime: schedule utility locates, order masonry or precast panels, and plan equipment-mini-excavator, skid steer, and a 2-4 ton crane if pieces exceed 1,000 lbs. Typical on-site work for a 6-foot monument runs 1-3 days, with concrete (3,000-4,000 psi) allowed 24-48 hours before backfill and 7 days for substantial loading; factor in inspections and weather delays.
Preparation and Excavation
Begin by staking the footprint and verifying setbacks against your site plan, then excavate to footing depth: 18-36 inches depending on frost line and sign height. You should place 4-6 inches of compacted crushed stone, set formwork for a 24-48 inch diameter footing for standard signs, and install rebar (No.4 at 12-18 inch centers) tied into anchor bolts sized 1/2″-3/4″ with 7-12″ embedment.
Erecting the Monument Sign
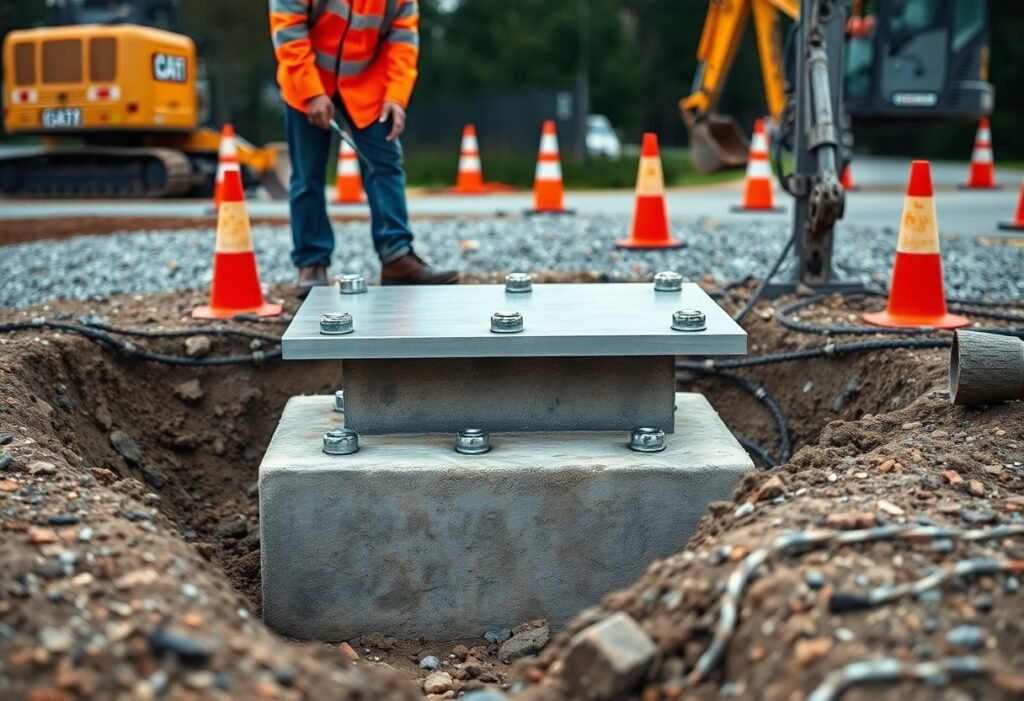
When setting the sign, you align anchor templates in wet concrete or use epoxy anchors in cured footings, then lift sections with rigging rated for the load-precast panels often weigh 800-1,500 lbs each. Use a level and plumb line to achieve 1/4″ per foot tolerance, torque anchors to manufacturer specs, and secure panels with stainless fasteners and structural adhesive where indicated.
For added reliability, you should grout under base plates with non-shrink grout, seal joints with polyurethane sealant rated for exterior UV exposure, and run electrical conduit to a weatherproof junction box if illuminated. Inspect anchor torque after 24 hours of initial cure, protect steel with galvanizing or powder coat, and document as-built elevations and photos for final approval.
Maintenance and Care
Routine Inspections
You should perform a quick visual inspection monthly and a full, documented check every six months. Use a checklist that logs lighting operation, face panel fading, masonry cracks, anchor-bolt tightness and any tilting; flag settlement over 1/2″ or foundation cracks for engineer review. After severe weather inspect immediately for loose fasteners, water intrusion and electrical moisture. Photograph issues, note dates, and track repairs to spot recurring failure points and cost trends over time.
Repair and Upkeep Strategies
Schedule preventive tasks: clean faces monthly with a mild detergent, reseal masonry joints every 3-5 years, and plan acrylic or polycarbonate face replacement every 5-7 years depending on UV exposure. Expect LED modules and drivers to reach roughly 50,000 hours (about 5-7 years of typical use) and budget for their staged replacement. Use manufacturer color-match paint and OEM parts to preserve warranty and visual consistency.
When repairing, prioritize safety and code compliance: have a licensed electrician handle line-voltage work and GFCI/grounding checks per local code. Keep an on-site kit of common spares-LED modules, diffusers, sealant, and anchor bolts-to reduce downtime. For masonry, remove failing sealant, clean joint surfaces, and apply a compatible polyurethane or silicone sealant rated for exterior movement; follow a torque schedule for anchor re-tensioning and document each maintenance event in a central log for warranty and lifecycle planning.
Conclusion
Conclusively, you should secure permits, select a visible compliant location, and prepare a reinforced concrete footing sized to sign weight. Confirm utilities and drainage, install anchor bolts and a plumbed, level cabinet, and run conduit for illumination if needed. Use weather-resistant materials, seal seams, and follow local codes and ADA/clearance rules. If you lack heavy-equipment experience, engage licensed installers to ensure safe, durable results.
FAQ
Q: What initial site steps are required before installing a monument sign?
A: Conduct a site survey to confirm property lines, sight lines, and local sign-code restrictions; obtain required permits and HOA approvals; request utility locates (call 811 in the U.S. or local service) to mark underground lines; identify frost depth, soil type, and drainage conditions to determine footing design; plan access for equipment and staging while maintaining pedestrian and traffic safety.
Q: How are footings and foundations designed for monument signs?
A: Footing design depends on sign size, wind and seismic loads, and soil bearing capacity; typical methods include poured concrete footings with embedded anchor bolts or reinforced concrete piers with rebar cages; specify concrete strength (commonly 3,000-4,000 psi), depth below frost line, and required reinforcement; provide formwork, vibration consolidation, curing time, and inspection before lifting the sign onto anchors.
Q: What are the common fabrication materials and construction details for monument signs?
A: Materials include cast or precast concrete, natural stone veneer over a structural backup, painted or powder-coated steel/aluminum, and routed or illuminated acrylic/metal letters. Specify structural backing and moisture barrier, weep/drainage systems for hollow cavities, UV-stable finishes, stainless steel fasteners where exposed, and tolerance/specs for mounting points and anchor embedment to match field conditions.
Q: What is the recommended process for lifting, anchoring, and leveling the sign on-site?
A: Use appropriate rigging and lifting equipment sized for the sign weight and shape; set a plumb reference and verify anchor bolt layout before lift; grout under base plates or use leveling shims to distribute loads; torque anchor nuts in a controlled sequence after grout cures or as specified; verify vertical plumb and horizontal alignment, then backfill and compact around foundation to prevent settlement.
Q: What electrical and finishing steps are necessary for illuminated monument signs?
A: Run conduit and power feed to a code-compliant junction box with accessible disconnect; size wiring and transformer/driver to LED load, include ground-fault protection and surge suppression; seal penetrations with silicone or appropriate gaskets to prevent moisture intrusion; test lighting, photometric performance, and controls (timers or photocells); complete exterior sealing, caulking, and touch-up coatings, and schedule electrical and final building inspections per local codes.