
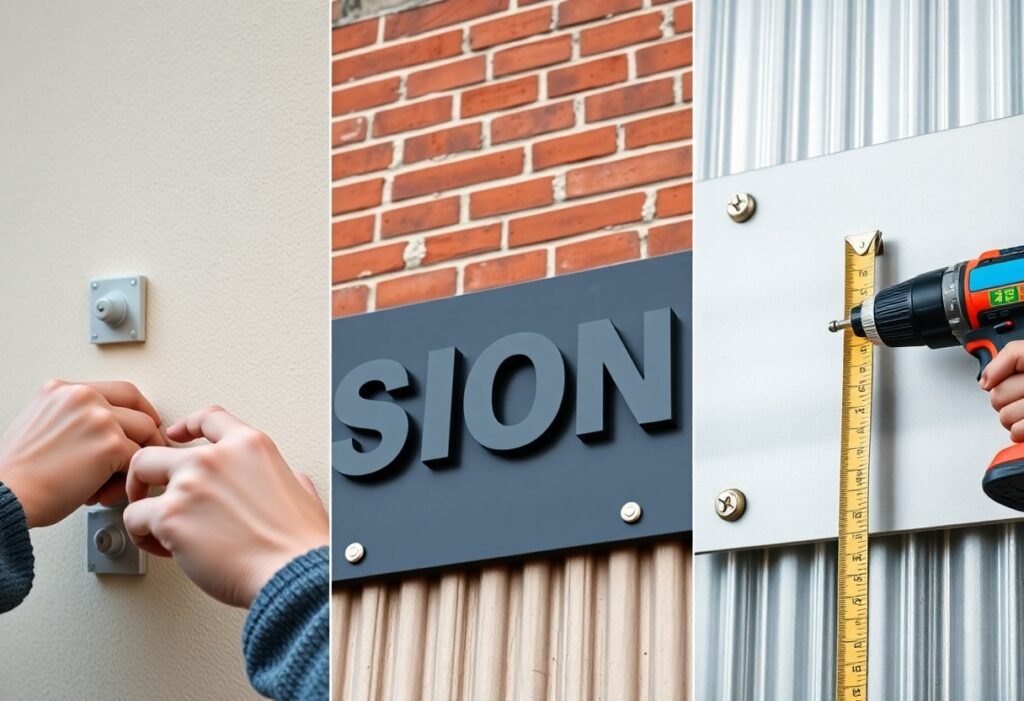
With the right assessment and fasteners, you can securely mount signs to stucco, brick, or metal by matching anchors to the substrate: use masonry or sleeve anchors for solid stucco and brick, toggles for hollow cavities, and self-tapping screws or rivets with neoprene washers for metal; predrill, use stainless hardware, seal penetrations, and verify load ratings to ensure your installation is safe and weatherproof.
Key Takeaways:
- Match fasteners to the substrate: use masonry anchors (Tapcon, sleeve, wedge) and a hammer drill for stucco/brick; use self-drilling screws, Tek screws, rivets, or bolts for metal.
- On stucco, locate solid backing or studs or install a plywood/backer plate; if anchoring through stucco into masonry, use long anchors and seal penetrations with exterior-grade caulk.
- When mounting to brick, drill into the brick face (not edges), clean dust from holes, and ensure proper embedment depth; avoid relying solely on mortar joints for load-bearing mounts.
- For thin metal or sheet surfaces, use rivets or backer plates and corrosion-resistant fasteners (stainless or coated); consider standoffs/spacers for ventilation and alignment.
- Plan for load and wind, use templates/levels, choose stainless or coated hardware for outdoor exposure, wear PPE, check for hidden utilities, and follow local code requirements.
Understanding Different Surface Types
You must assess porosity, substrate behind the finish, thermal movement, and load capacity before choosing anchors or adhesives; some surfaces take direct fasteners, while others require through-bolts, chemical anchors, or surface-rated adhesives. You will adjust drill bits, anchor diameters, and sealants based on whether the wall is brittle, hollow, or metal-clad. Perceiving the substrate behavior directs whether you fasten into the finish, the backing, or use a flange or stand-off to transfer load.
- Porosity and hardness
- Backing material (sheathing, masonry, studs)
- Thermal expansion and movement
- Corrosion resistance and finish protection
| Stucco | Brittle finish over lath or masonry – anchor into backing, not just render |
| Brick | Solid vs. veneer matters – drill into brick face, avoid mortar joints |
| Metal | Non-porous, may require self-tapping screws, rivets, welding, or structural adhesives |
| Concrete block | Hollow cores need toggle or resin anchors; solid cores accept sleeve anchors |
| Wood siding | Fasten into studs or use heavy-duty washers/backplates to spread load |
Characteristics of Stucco
You’ll find stucco is typically a 3/8″-3/4″ cement or acrylic layer over metal lath or masonry; the finish is brittle and can crack if you torque anchors in the render alone. You should penetrate the stucco and embed anchors into the solid substrate behind it – use masonry anchors, expansion screws, or through-bolts with neoprene washers to seal penetrations and distribute load for larger signs.
Working with Brick
You should target brick units, not mortar, when fastening signs: drill with a carbide masonry bit and use sleeve anchors or masonry screws sized to the load and brick type. You will avoid placing anchors within 2-3″ of edges or other fasteners to prevent splitting; for veneers, consider backing plates or through-bolts tied to structural backing behind the brick.
When installing medium signs (2-4 ft), you commonly use four anchors spaced to match studs of the sign frame; for heavy signs over 50 lb, choose 1/4″-3/8″ sleeve anchors or chemical (epoxy) anchors with 1″ minimum embedment into the brick face. You must blow or vacuum drill dust before insertion and use stainless steel fasteners in exterior, coastal, or high-humidity locations to avoid corrosion and staining.
Installing on Metal Surfaces
You’ll select attachment methods by gauge and coating: thin sheet metal favors self-tapping screws or pop rivets, while structural steel accepts welded studs or tapped holes; for painted or coated panels, use neoprene washers and stainless hardware to prevent galvanic corrosion. You can also use structural adhesives (3M VHB or epoxy) for smooth, clean panels when you need no penetrations and the load and environment allow.
Prep is critical: degrease with solvent, roughen glossy paint with 80-120 grit, and prime bare steel to ensure long-term bond for adhesives. For rivets or screws, match fastener shear strength to sign weight and maintain 1-2″ edge distance; when using adhesives, follow manufacturer cure times (often 24-72 hours) and test a sample panel for peel strength before full installation.
Tools and Materials Needed
You’ll gather a hammer drill or rotary hammer, masonry bits (3/16″-1/2″), level, tape measure, safety goggles and dust mask, caulking gun and exterior-grade sealant, plus anchors or epoxy rated for masonry; for real-world tips on installing heavy posts into brick or mortar see Hanging Heavy Sign Post – Into Brick or Mortar? and balance anchor type with substrate strength before you start.
Basic Tools
Your core kit should include a hammer drill with variable speed, masonry drill bits in 1/8″, 3/16″, 1/4″ and 3/8″ sizes, a 4-ft level, tape measure, pencil, ratchet or wrench set, caulk gun, and protective gear; if you work on harder brick or concrete, use a rotary hammer and SDS bits to speed drilling and reduce bit breakage.
Adhesives and Fasteners
Use stainless-steel sleeve or wedge anchors for solid brick/concrete, Tapcon masonry screws for medium loads, and injectable epoxy anchors (Hilti/Simpson-type) for heavy signs or shaky mortar; choose corrosion-resistant grades (304 or 316) for exterior exposure and match anchor diameter to load and substrate.
For sizing, aim for at least 2-3″ embedment in solid masonry for light signs and 3-4″+ for heavier mounts; when attaching to hollow brick use chemical anchors combined with internal anchors or heavy-duty toggles, and always follow manufacturer pull-out ratings-for example, a 3/8″ epoxy anchor can provide several hundred pounds of capacity in solid brick, while multiple anchors spread the load for signs over 100-200 lb.
Preparation Steps
Before you drill, verify substrate condition, flatness, and exact sign dimensions; inspect stucco for hairline cracks, check brick mortar joints, and confirm metal backing presence. You should confirm sign weight-under 50 lb allows sleeve anchors; over 50 lb needs through-bolts or backing plates-and locate electrical or irrigation lines with a scanner. Finally, gather templates, fasteners, and protective gear so you can move straight into layout and drilling.
Surface Cleaning
On stucco or brick, you should remove loose dust and efflorescence with a stiff brush and vacuum, then wash with trisodium phosphate or a mild degreaser and allow 24 hours to dry. For metal, de-grease with acetone and scuff with 80-120 grit to promote adhesion for adhesives or sealants. If paint is peeling, chip back to sound material and prime exposed areas before mounting hardware.
Measuring and Marking
You should use a tape measure and laser level to establish a centerline and reference heights-set the sign’s vertical center at typical sightline heights (60-66 inches for interior signs, 72-84 inches for exterior storefronts). Transfer the sign template to the wall with a chalk line or adhesive paper template, then mark hole centers with an awl or pencil; for multiple anchors, stagger holes 12-24 inches apart depending on wind load and sign size.
When marking, place a paper or vinyl template and verify level from at least two points; you should match drill bit diameter to the anchor (e.g., 3/16″ bit for 3/16″ masonry anchors) and keep hole centers at least 2-3 inches from edges or mortar joints to avoid spalling. If you encounter a hollow or cracked brick, shift the hole 1-2 inches or plan for through-bolting with a backing plate; for multi-panel signs, measure diagonals to confirm squareness before drilling.
Installation Techniques for Stucco
You’ll match technique to substrate thickness, sign weight and wind load: for lightweight signs under ~20 lb use high-bond tapes/adhesives; medium 20-75 lb pieces pair adhesives with 2-4 anchors spaced 12-24″ apart; heavy signs over 75 lb require through-bolts into blocking or solid masonry anchors. Use stainless steel fasteners to resist corrosion, keep anchor spacing aligned with studs or solid substrate, and always seal penetrations to prevent water entry into the stucco cavity.
Drilling and Anchoring
Start with a hammer drill and carbide masonry bit sized to the anchor (common bits: 3/16″, 1/4″, 3/8″); drill ½” deeper than anchor length to clear dust. For solid masonry use sleeve or wedge anchors; when stucco covers a hollow cavity use toggle bolts or epoxy-set threaded rods. Torque anchors to manufacturer spec, avoid over-tightening which can crack render, and seal around each penetration with silicone or polyurethane sealant to keep moisture out of the wall assembly.
Using Adhesives
Choose structural adhesives like polyurethane construction adhesive (e.g., PL Premium), two-part epoxy, or 3M VHB for smooth, clean stucco finishes; they bond best to primed, dry surfaces. Adhesives work well for flat-backed signs up to ~40 lb when wind loads are low-use temporary supports while the adhesive cures (typically 24-72 hours). For added safety combine adhesive with mechanical anchors on medium or wind-exposed installations.
Prep is key: remove loose render, abrade glossy finishes, then solvent-clean and prime porous stucco with an acrylic primer per adhesive datasheet. Apply continuous ¼”-¾” beads or full-coverage fillets in a zig-zag pattern to avoid air pockets; thicker beads slow cure-epoxies set in ~24 hours at 70°F while polyurethanes reach full strength over several days. For critical loads perform a small pull test or follow manufacturer shear ratings before relying solely on adhesive bonding.
Installation Methods for Brick
Brick requires selecting anchors for the brick type and sign load: solid clay brick accepts sleeve or wedge anchors, while hollow or soft bricks may need chemical anchors or through-bolted backing plates. You typically use 1/4″-3/8″ anchors with 1.5″-2.5″ embedment for light-to-moderate signs and switch to epoxy-set threaded rods for loads above ~100 lb or high-wind locations. You should always avoid drilling only into mortar unless using expansion anchors rated for that use.
Drilling into Brick
Use a hammer drill with carbide masonry bits sized to your anchor (3/16″-1/2″) and drill into the brick face-not the mortar-for maximum pull-out strength. Aim for 1.5× the anchor diameter or at least 1.5″ embedment; for a 3/8″ sleeve use ~2″ depth. Clear dust with compressed air between holes, test-fit anchors dry, and tighten to manufacturer torque (typically 5-15 ft·lb) to avoid cracking the brick.
Alternate Installation Strategies
When drilling is impractical or brick is weak, you can use through-bolting with a stainless-steel backer plate, chemical anchors (epoxy) in drilled holes, or masonry screws like Tapcon into solid brick. For signs under ~20 lb consider structural adhesives such as a rated polyurethane or hybrid polymer applied to a cleaned, primed surface. You should match the strategy to expected loads, exposure and long-term maintenance access.
For heavier signs, install a 1/8″ stainless backer plate spanning multiple bricks and secure with four 3/8″ through-bolts with 2″ embedment, or bond graded epoxy anchors (e.g., Hilti HIT) for shear and tensile capacities exceeding 2,000-5,000 lbf per anchor depending on resin and hole diameter. You must use stainless hardware in coastal environments and plan bolt spacing at least 8-12″ apart to distribute load and reduce localized spalling.
Installing on Metal Surfaces
You’ll choose between structural adhesive and mechanical fasteners based on sign size and wind load: small aluminum panels (up to ~36″×48″) can be bonded with VHB tape plus intermittent fasteners, while larger or high-wind signs require through-bolts or self-drilling screws with backing plates; use stainless hardware in coastal areas and follow local wind-load tables to set fastener count and spacing.
Surface Preparation for Metal
Start by degreasing with isopropyl alcohol or acetone, then remove loose coatings or oxidation with 80-120 grit sandpaper; for painted or galvanised substrates apply an appropriate primer or etch primer, and for adhesive bonds roughen with 180-220 grit to increase surface energy; dry fully and deburr drilled holes to ensure flush seating of washers and rivets.
Securing the Sign on Metal
For through-fastening use #10-#14 stainless self-drilling (TEK) screws with EPDM or neoprene washers, spaced 12-24 inches depending on exposure; for thin-gauge panels prefer blind rivets (3/32″-3/16″ shank sizes), and for heavy-duty mounts use bolts with a backing plate and locknuts to distribute load; choose 316 stainless for salt-air environments.
Lay out hole pattern before drilling, mark each hole, and pilot-drill to the fastener shank size (common pilot sizes: 1/8″ or 3/16″ for rivets); use a torque-limited driver to avoid crushing sheet metal, seal each fastener head and washer with a polyurethane or silicone sealant bead (~3-4 mm) to prevent water ingress, and consider combining full-surface VHB tape with mechanical fasteners for redundancy on larger panels.
Summing up
Conclusively you install signs on stucco, brick, or metal by matching fasteners to the substrate: use masonry or sleeve anchors into brick, secure to the stucco substrate or to backing/furring strips behind the stucco and seal all penetrations, and use stainless self-tapping screws, rivets, or welded brackets for metal. Use corrosion-resistant hardware, level and secure with proper pilot holes, and seal around fastener heads to prevent water intrusion.
FAQ
Q: What are the general steps to install a sign on stucco, brick, or metal surfaces?
A: Plan the location, check the substrate type (solid masonry, hollow cavity, wood backing, or thin metal), measure and mark mounting points, select an attachment method sized for the sign weight and expected wind loads, prepare tools and corrosion-resistant hardware, drill correct-diameter holes with the proper bit, install anchors or fasteners to manufacturer torque/specs, seal all penetrations with an exterior-grade sealant, and test the installation for pull-out and alignment. For lightweight signs consider high-quality structural adhesive or VHB tape after proper surface prep; for medium/heavy signs use mechanical anchors or backing plates.
Q: How do I mount a sign on stucco without cracking the finish or losing holding power?
A: Locate studs or solid backing if possible by probing from inside or using longer pilot holes. Drill through the stucco coat into the solid substrate behind (use a masonry bit). Use sleeve anchors, wedge anchors, or masonry screws (Tapcons) sized for the load and set them into the substrate, not just the stucco layer. If no backing exists, attach a treated plywood or aluminum backer through the stucco into studs, then fasten the sign to that backer. For lighter plaques, use a structural adhesive formulated for masonry after cleaning, drying, and priming the stucco; clamp while curing. Always place neoprene washers under heads to distribute load and seal around fasteners with polyurethane or silicone sealant to prevent moisture intrusion.
Q: What is the best practice for installing signs on brick, and should I drill into mortar or brick?
A: Drill into the brick body rather than the mortar for the best hold. Use a carbide masonry bit, clean the hole with compressed air, and choose anchors rated for masonry-sleeve anchors, wedge anchors, Tapcon screws, or epoxy-set threaded rods for heavy loads. Maintain appropriate edge distance (generally at least 2-3 times the anchor diameter from brick edges) and spacing between anchors. When mounting into soft or cracked brick, use a bonded epoxy anchor system. After setting anchors, use stainless-steel washers and sealant around fasteners to prevent water entry and rust staining.
Q: How should I attach a sign to metal surfaces, including thin sheet metal and structural steel?
A: For thin sheet metal use blind/pop rivets, self-drilling sheet-metal screws with sealing washers, or rivnuts (nutserts) to create strong, reusable threads. For thicker or structural steel, use tapped and bolted connections, welded studs, or through-bolts into backing plates. Account for thermal expansion by using slotted mounting holes or oversized holes in the sign bracket, and isolate dissimilar metals with nylon or rubber washers to reduce galvanic corrosion. Choose stainless steel (304 or 316 for coastal) or plated fasteners and apply silicone or neoprene washers to seal and damp vibration.
Q: When should I use adhesives instead of mechanical anchors, and how do I weatherproof the installation?
A: Use adhesives (high-performance construction adhesive, structural epoxy, or VHB tape) for small, lightweight signs on clean, non-porous surfaces or where drilling is not possible; adhesives are not recommended for heavy signs or high-wind locations without mechanical backup. Prep surfaces by cleaning, degreasing, and abrading; prime porous surfaces per adhesive instructions and allow full cure before releasing clamps. Weatherproof mechanical installations by using stainless or properly coated hardware, neoprene washers and backing plates to spread loads, and sealing all penetrations with a paintable exterior polyurethane or silicone sealant. Inspect periodicly for corrosion, sealant failure, and anchor tightness and touch up any exposed metal finishes to prevent rust.