
Sign visibility at night depends on effective lighting and maintenance; you can boost brightness by choosing high-efficiency LEDs, proper driver sizing and heat management, optimized diffuser and reflector design, uniform LED spacing, supplemental outline or backlighting, correct mounting height and aiming, and routine cleaning and component replacement to prevent gradual dimming.
Key Takeaways:
- Use high-quality, weather-rated LED modules and drivers sized for the sign; choose appropriate color temperature (typically 3000-5000K) and higher lumen output for night visibility.
- Optimize optics and layout-use lenses, reflectors, light guides or diffusers and correct LED spacing to achieve even illumination and reduce hotspots.
- Employ external lighting and proper aiming for non-illuminated or washed signs-gooseneck fixtures, uplights or shielded floods can boost night brightness without glare.
- Maintain the sign regularly-clean lenses, clear vegetation, replace aged LEDs/drivers, and inspect wiring to prevent light loss over time.
- Use controls and power management-photocells, timers, dimmers and stable drivers (or safe increases within manufacturer specs) to adjust nighttime output and ensure consistent performance.
Understanding Sign Brightness
Importance of Visibility
Visibility directly affects how quickly you spot and interpret a sign at night; at 35 mph you cover about 51 feet per second, so a 3-second recognition window gives roughly 150 feet to read and act. You improve that margin by matching letter height, contrast, and luminance to approach distance, and by choosing light sources and color temperatures that preserve legibility for drivers of varying ages and vision acuity.
Factors Affecting Nighttime Brightness
Brightness depends on light source (LED vs fluorescent vs neon), face materials (diffuse acrylic, prismatic retroreflective sheeting), lumen output, color temperature, mounting angle, ambient lighting, and maintenance frequency. You must balance initial lumens with lumen depreciation and glare control; for many backlit signs targeting roadways, specifying LEDs with 3000-4000K and L70 ≥50,000 hours gives reliable performance without excessive blue scatter.
- Light source: LEDs typically offer higher efficacy (60-150 lm/W) and easier dimming than fluorescent options.
- Materials: high-intensity prismatic sheeting can boost retroreflectivity and extend readable distance versus engineering-grade films.
- Maintenance: urban sites can see 20-40% effective brightness loss from dirt and deposits within a year if you skip cleaning.
- Thou must verify design choices under real nighttime conditions before final installation.
Apply practical rules: 1 inch of letter height per ~30 feet of legibility distance, so a 150-foot approach calls for ~5-inch letters; specify LEDs with L70 ≥50,000 hours and plan for 10-20% lumen depreciation in your photometric budget. You should also favor 3000-4000K for a balance of contrast and reduced long-distance scatter, and confirm outcomes with on-site lux or cd/m² measurements.
- Letter sizing: use the 1 in : 30 ft rule and validate with sightline tests.
- Lumen budgeting: include 10-20% depreciation and choose fixtures rated L70 ≥50,000 hours.
- Color temp: 3000-4000K often yields good contrast while limiting blue-light scatter for older drivers.
- Thou will perform photometric checks (lux and cd/m²) at actual viewing positions before sign approval.
Types of Lighting for Signs
You’ll commonly encounter LEDs, neon, fluorescent tubes, HID/metal‑halide fixtures and edge‑lit backlit modules for signs; each differs in lumen output, efficiency and maintenance demands. LEDs typically deliver 80-140 lm/W and long life, fluorescent runs 60-100 lm/W for large backboxes, neon gives saturated color but higher voltage, and HID provides intense output for tall structures. The optimal choice depends on viewing distance, energy goals and color fidelity.
- LED
- Neon
- Fluorescent
- HID / Metal‑Halide
- Edge‑lit / Backlit Acrylic
Type and Typical Use
| LED | 80-140 lm/W; low maintenance, dimmable, common for channel letters and lightboxes |
| Neon | Distinct color saturation; 10-15 year life, used for vintage or high-contrast signage |
| Fluorescent | 60-100 lm/W; cost-effective for large backlit panels but needs frequent ballast service |
| HID / Metal‑Halide | High lumen output for distant visibility; higher energy and color shift over life |
| Edge‑lit / Backlit Acrylic | Even face illumination for slim signs; relies on high-CRI LEDs and diffusion films |
LED vs. Traditional Lighting
You’ll find LEDs cut energy use by about 50-80% compared with incandescent and often 30-50% versus fluorescents, while delivering 50,000+ hour lifetimes. LEDs offer directional light and easy dimming, whereas traditional lamps can provide uniform omni‑light but demand more replacement and ballast maintenance; your ROI calculations should include initial cost, energy price and service access when choosing between them.
LED vs Traditional: Key Metrics
| Efficiency | LED 80-140 lm/W; Incandescent ~10-20 lm/W; Fluorescent 60-100 lm/W |
| Lifetime | LED 50k+ hours; Fluorescent 7-15k; Incandescent 1-2k |
| Maintenance | LED low; Traditional higher due to bulbs/ballasts |
| Initial Cost | LED higher upfront, lower total cost over life |
Color Temperature and its Impact
Your sign’s color temperature (measured in Kelvins) affects perceived brightness and legibility: 3000K-3500K feels warm and can reduce contrast, 4000K is neutral and versatile, while 5000K-6500K appears cooler and can read brighter at night; test samples at actual mounting height and distance to match branding and visibility goals.
Color Temperature Effects
| 3000K (Warm) | Soft, cozy look; may reduce contrast at night |
| 4000K (Neutral) | Balanced color rendering; good for retail signs |
| 5000K-6500K (Cool) | Appears brighter and sharper at distance; can feel clinical |
You should weigh CRI and photopic/mesopic effects when choosing temperature: high CRI (≥80) preserves brand colors, while mesopic sensitivity at low luminance can make cooler temps appear disproportionately brighter; combine 4000K-5000K LEDs with diffusers or louvers to balance visibility and color fidelity for roadway and storefront applications.
Further Considerations
| CRI | ≥80 recommended for accurate color; ≥90 for brand-critical signs |
| Mesopic Response | At low light, eye favors blue‑rich (cool) light, increasing perceived brightness |
| Diffusion | Diffusers smooth hotspots but reduce raw lumen by ~10-30% |
Techniques to Enhance Brightness
Use high-CRI LEDs (≥80) and select 3000-5000K color temperatures to balance legibility and brand tone; aim for uniformity within 15-20% across the sign face and add diffusers to remove hotspots. Combine backlighting for channel letters with front-lit acrylic for storefronts, and integrate dimming controls to adjust for ambient conditions. For guidance on color and system choices see Choosing Ideal Illumination Strategies and the Best Colors.
Proper Angle and Positioning
Mount external floods at a 30-45° angle to the sign plane to maximize even coverage and cut glare, and keep fixture-to-sign distance close to the sign height for consistent beam spread; tilt channel letters down 5-10° to reduce sky reflections. If your sign faces a busy road, aim for 10-20 lux at the viewer line for readability without causing driver discomfort.
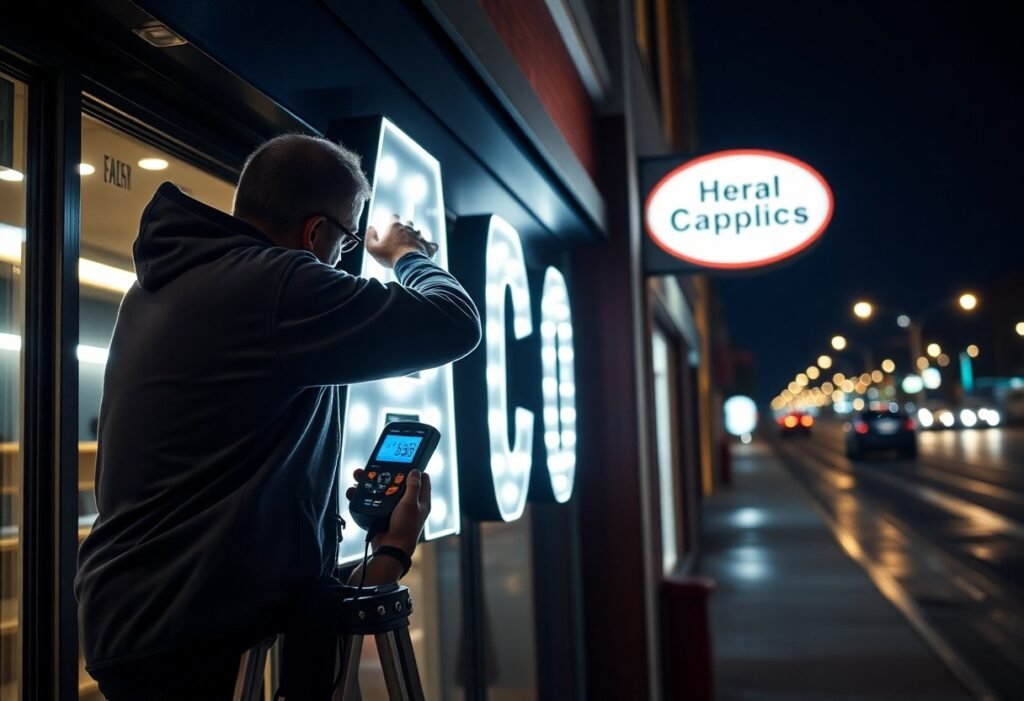
Maintenance of Signage
Establish cleaning every 3-6 months, inspect LED modules quarterly, and test power supplies annually; LEDs typically last 50,000-100,000 hours while drivers often need replacement every 5-7 years. You should keep spare modules and log lumen readings so you catch degradation before it affects visibility.
Create a checklist: perform monthly visual checks for water ingress and corrosion, take quarterly lux readings with a handheld meter-keeping output within 15% of spec-and replace diffusers when transmittance drops below ~80%. Also verify enclosure IP rating (IP65+ for exposed sites), secure wiring with corrosion-resistant terminations, and record every service entry in a digital log to plan preventive replacements rather than emergency fixes.
Use of Reflective Materials
You should integrate retroreflective sheeting or microprismatic films on sign faces to bounce vehicle headlights back to drivers, increasing effective brightness without power. Retroreflectivity is measured in cd/lx/m^2 and governed by ASTM D4956 (Types I-VII); selecting the right type for speed and viewing distance matters-highways often use Type III or VII. Manufacturers like 3M Diamond Grade and Avery Dennison supply high-gain films that can extend readable range by tens of meters under typical headlight lux levels.
Benefits of Reflective Surfaces
Using reflective surfaces raises nighttime legibility while needing no electrical supply, often improving detection distance by 20-100% depending on film grade and mounting height. You gain lower maintenance versus lights, consistent performance during power outages, and better contrast against low-light backgrounds; on urban routes (30-50 km/h) you’ll notice clearer letter recognition, while on highways reflective grades preserve visibility at higher approach speeds.
Recommended Materials
You should prioritize prismatic retroreflective sheeting-diamond-grade (Type VII) for high-speed corridors, high-intensity prismatic (Type III) for arterial routes, and engineering-grade (Type I) for short-range or temporary signs. Microprismatic films outperform glass-bead coatings in wet conditions, and metallized vinyl can serve for short-term use. Always choose materials compliant with ASTM D4956 and match cd/lx/m^2 ratings to your sight-distance requirements.
For example, 3M Diamond Grade products often show initial retroreflectivity above several hundred cd/lx/m^2 with service lives commonly 8-12 years in sun-exposed locations, while high-intensity prismatic films typically start around 150-400 cd/lx/m^2 and last 5-8 years. You’ll need to consider substrate (aluminum is preferred), adhesive quality, UV exposure, and routine cleaning-monthly washes can significantly slow reflectivity loss from dirt and deposits.
Energy Considerations
Balance lumen output against watts: modern LEDs deliver 100-200 lm/W, so a 1,000-lumen target needs roughly 5-10 W versus 25-40 W from older tech. If your sign runs 12 hours nightly, that difference equates to hundreds of kWh annually. Combine efficient fixtures with photocells, timers, or dimming to match brightness to conditions and minimize wasted power.
Energy-efficient Solutions
Choose high-efficacy LED modules (120-180 lm/W), constant-current drivers, and segmented dimming for zoning. For example, retrofitting a 4×8 routed sign with 40W LED strips instead of 150W neon yields about a 73% energy reduction. Add ambient sensors to dim 30-60% during low-visibility hours or use solar+battery for remote signs to eliminate grid draw.
Cost Analysis
At $0.15/kWh, a 150W sign running 12 hours/day uses 1.8 kWh/day (~$98/year); swapping to 40W LEDs cuts that to 0.48 kWh/day (~$26/year), saving about $72 annually. If your retrofit costs $600, pure energy payback is roughly 8-9 years; factoring reduced maintenance from 50,000‑hour LEDs typically shortens payback to 4-6 years.
Factor in rebates and incentives: many utilities offer $1-$3 per watt saved, so a 110W reduction could return $110-$330, cutting your payback time significantly. Also account for labor, sign-face replacement, and expected service intervals-LEDs with 50,000-100,000-hour lifespans commonly halve lifecycle costs versus fluorescent or neon. For commercial projects, accelerated depreciation and local grants can further improve ROI.
Regulatory Compliance
You must align brightness upgrades with codes and permits: many jurisdictions limit nighttime sign luminance (commonly in the 50-300 cd/m² range) and require automatic dimming or curfews, plus electrical compliance per NEC Article 600. Follow manufacturer specs and listing standards (UL 48 for electric signs, UL 8750 for LED components), document photometric readings for the permitting authority, and plan for inspections to avoid fines or mandatory de‑lamping.
Local Signage Regulations
Consult your municipal zoning and sign ordinances before design changes: cities often control size, setback, hours of operation, and maximum luminance-some cap active displays to ~200 cd/m² at night and force a 30-70% dim after 10-11pm. You should obtain a permit, submit measured lux or cd/m² data, and follow any spacing requirements for digital billboards along arterials or highways.
Safety Standards
When upgrading illumination, comply with electrical and product safety rules: NEC Article 600 covers wiring and disconnects for signs, while UL 48 and UL 8750 address safe installation and LED component performance; aim for IP65+ enclosures for exterior fixtures and include surge protection and properly sized overcurrent devices to meet local inspection criteria.
In practice, you should size branch circuits to handle LED inrush, provide a labeled disconnect per NEC, and use listed drivers with thermal and short‑circuit protection. Install SPDs rated for common-mode transients (typical nominal 10 kA surge capacity), ground and bond all metal, and keep a maintenance log with annual photometric checks to verify dimming strategies and ensure ongoing compliance.
FAQ
Q: What lighting technology produces the brightest, most energy-efficient signs at night?
A: LEDs are the current best choice for bright, energy-efficient signage. Choose high-efficacy LEDs (lm/W) with a quality driver and good thermal management to maintain lumen output and lifespan. Use chips with appropriate CRI if color rendering matters; a neutral color temperature (3000-4500K) balances visibility and color fidelity. For uniform face illumination, consider edge-lit acrylic with a properly patterned light guide or direct-backlit modules with diffusers. Avoid underpowered fluorescents or old neon unless a specific aesthetic is required.
Q: How do mounting, beam angle and aiming affect nighttime sign brightness?
A: Mounting height, distance, and beam angle determine how light spreads across the sign face. Use narrower beam angles and focused modules for deep-letter or channel-lit elements; use wider angles and diffusers for flat-face signs to avoid hotspots. Position fixtures to minimize shadowing from letters, adjust tilt to compensate for viewing angles, and add baffles or louvers to control spill light and glare. Consistent spacing and overlapping beams improve uniformity.
Q: How bright should a sign be and how do I comply with local regulations and glare control?
A: Brightness targets depend on location and surrounding ambient light-urban, roadside, and residential settings require different luminance. Check local codes for limits (some jurisdictions specify nits or lux). Use a photometer or a qualified lighting designer to set levels that are readable without causing glare to drivers or neighbors. Implement dimming controls, photocells, or adaptive sensors to reduce output after peak hours and meet glare/obtrusive light requirements.
Q: What sign face materials and finishes improve perceived brightness and contrast at night?
A: Translucent acrylic or polycarbonate faces with internal diffusion optics produce even brightness. High-contrast lettering-light characters on a dark background or vice versa-improves legibility. Use matte surrounds to reduce stray reflections and glossy faces only where specular highlights won’t hinder readability. Reflective vinyl or engineered retroreflective elements can boost visibility for certain applications, but avoid highly reflective finishes that create glare under direct lighting.
Q: What maintenance and control strategies keep a sign bright and reliable after installation?
A: Schedule regular cleaning of the sign face and fixtures to remove dirt and reduce light loss. Inspect and replace failing LEDs, drivers, and seals; maintain proper thermal paths to prevent overheating. Install surge protection and use quality power supplies. Add photocells, timers, or networked dimming to adapt brightness to ambient conditions and extend component life. Keep documentation of components and a maintenance log to streamline repairs and calibrations.