
Graphics installation begins with measuring and planning your layout, choosing the correct film, and thoroughly cleaning the glass; you then apply a wet or dry method depending on the vinyl, align and tack the top edge, use a squeegee to remove bubbles from center outward, trim excess material, and allow proper curing before final inspection to ensure adhesion and longevity.
Key Takeaways:
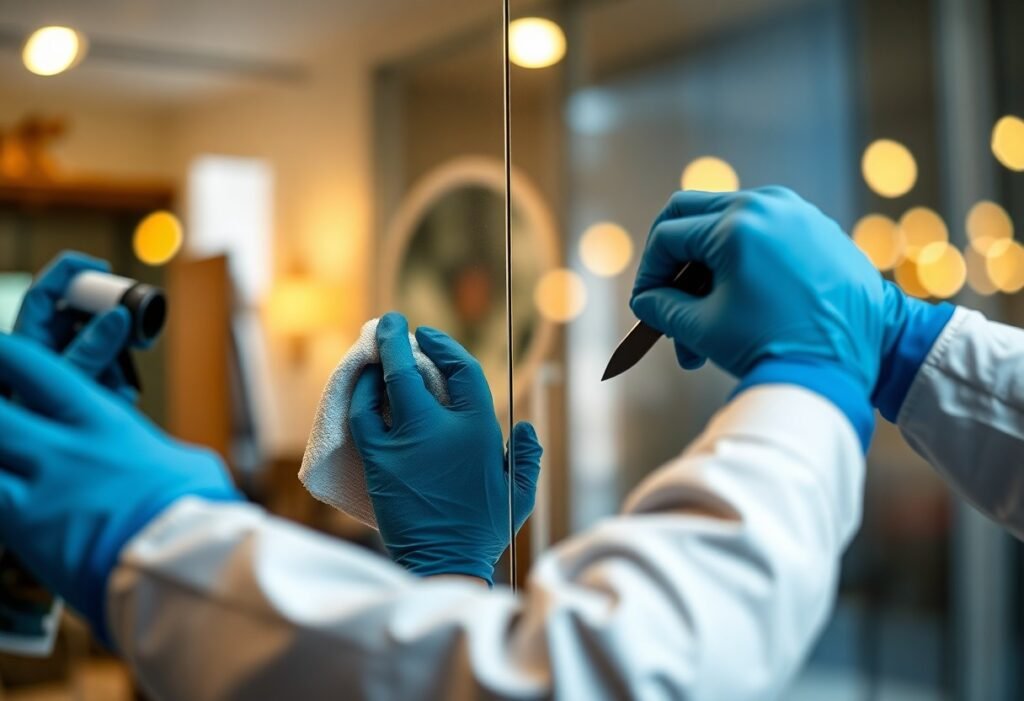
- Prepare the glass: remove dirt, grease and old adhesive with glass cleaner or isopropyl alcohol; dry and remove dust with a lint-free cloth.
- Measure and position: measure, mark alignment points with low-tack tape, create a hinge (top-edge tape) to hold the graphic in place before application.
- Choose application method: use the wet method (spray application fluid) for repositioning and large graphics, or the dry method for small, rigid decals.
- Apply and squeegee: lay the graphic, squeegee from center outward at a steady angle to expel air and fluid; slowly peel backing or transfer tape at a low angle.
- Finish and cure: trim excess, heat and conform to curves if needed, pop persistent bubbles with a pin and press flat, and allow adhesive to set per manufacturer guidelines; seal edges for exterior installations.
Understanding Window Graphics
Window graphics combine printed vinyl, perforated film, frosted or translucent media to deliver branding, privacy, and solar-control solutions; you select material based on visibility, durability, and building exposure. Outdoor calendered vinyl typically lasts 3-5 years, cast vinyl 5-7 years with UV laminate, and perforated (50/50) preserves sightlines while showing full-color imagery. Inspect glass type, sun exposure, and mounting height to avoid adhesive failure and excessive glare.
Types of Window Graphics
Perforated vinyl, opaque vinyl decals, frosted/etched films, translucent backlit media, and static-cling all serve different goals: you choose perforated for street-facing ads, opaque for bold branding, frosted for privacy, backlit for illuminated displays, and static-cling for short-term promos or rentals. Each type varies in opacity, lifespan, and installation complexity, so match substrate and campaign duration to material specifications.
- Perforated (50/50) – good visibility and pedestrian-facing advertising; typical outdoor life 3-4 years.
- Opaque vinyl decals – high-opacity, vibrant color, often 3-5 year exterior life with laminate.
- Frosted/etched film – privacy with diffuse light transmission; common in offices and bathrooms.
- Backlit/translucent film – optimized for lightboxes and illuminated signage; performs indoors and in protected exteriors.
- Thou should pick static-cling for temporary promotions since it installs in minutes and removes cleanly without residue.
| Perforated (50/50) | Visibility: ~50% outward; Best use: street-level ads; Lifespan: 3-4 yrs |
| Opaque Vinyl Decals | Visibility: 0% through film; Best use: branding/logos; Lifespan: 3-5 yrs with laminate |
| Frosted / Etched Film | Visibility: diffused light only; Best use: privacy/wayfinding; Lifespan: 5+ yrs indoors |
| Backlit / Translucent Film | Visibility: vibrant when illuminated; Best use: lightboxes/storefront displays; Lifespan: 3-6 yrs |
| Static-Cling | Visibility: removable and reusable; Best use: short-term promos; Lifespan: months to 1 yr |
Benefits of Window Graphics
Window graphics drive continuous brand impressions at storefronts, improve wayfinding, add privacy, and can reduce solar glare; in one example a regional retailer reported a 12% increase in walk-ins within four weeks after a coordinated window campaign. You also gain low-cost, high-visibility advertising that works 24/7 and integrates with QR codes or promo tracking for measurable results.
Beyond immediate visibility, you can quantify ROI: materials commonly range $8-$20 per sq ft and professional installation $2-$6 per sq ft, with expected outdoor lifespans of 3-7 years depending on substrate and lamination. You should schedule routine cleaning with mild detergent, choose removable films for seasonal changes, and verify local sign codes to avoid compliance issues that can delay campaigns.
Preparation for Installation
Measuring the Window Space
Measure the width and height at the top, middle and bottom and note the smallest dimension; record glass thickness, frame reveal and any mullions or vents that interrupt the surface. Use a steel tape or laser and log measurements to the nearest millimeter or 1/8″. Allow a 5 mm (1/8″) installation gap for inside-mounted graphics or a 10-25 mm bleed if you’re wrapping to the frame; for example, a 36″×72″ storefront often ships as 35 7/8″×71 7/8″.
Selecting the Right Material
Decide between cast, polymeric and calendared vinyl based on exposure and lifespan: cast for 7-10 years exterior, polymeric 5-7 years and calendared 3-5 years. Choose perforated one-way-vision (50/50 or 70/30 patterns) when you need outward visibility, frosted or opaque films for privacy, and static-cling or removable adhesive for short-term promotions. Add a UV-stable laminate for high-traffic or sun‑exposed installations to extend durability and resist scratching.
When you specify material, include adhesive type and finish: permanent solvent adhesives bond best on exterior glass, repositionable adhesives ease bubble-free installs for multi-panel fits, and removable adhesives prevent residue on rental spaces. For best results pick a reputable line-3M Controltac or Avery MPI cast films are common choices-and match laminate (matte reduces glare, gloss intensifies color). For perforated film, 50/50 gives balanced image and outward view; 70/30 favors visual impact at the expense of see-through clarity.
Tools and Equipment Needed
Gathering the right tools prevents delays and reduces rework: you should carry precise measuring gear (25 ft tape, cross-line laser), cleaning supplies (70% isopropyl, microfiber cloths), application tools (4″ felt and 6″ rubber squeegees), a sharp utility knife with spare #11 blades, spray bottle with slip solution (water + a drop of dish soap), masking and transfer tape, and a straightedge or ruler for trimming and alignment.
Essential Tools
You need a 25 ft tape measure and a laser or bubble level for alignment, a soft 4″ felt squeegee for initial laydown and a stiffer 6″ rubber squeegee for final burnishing, a utility knife with at least 10 spare blades, lint-free microfiber towels, 70% isopropyl alcohol in a spray bottle, masking tape for positioning, and quality application/transfer tape rated for your vinyl type.
Additional Equipment
For larger installs, bring a pair of 4-6″ suction cups, an A-frame or extension ladder rated for at least 250 lb, nitrile gloves, safety glasses, and a heat gun or high-power hair dryer for edge working and conforming to frames; plan for two installers when glass exceeds 5 ft in height or graphics are over 10 sq ft.
When using a heat gun, work on low-to-moderate settings and keep it moving to avoid overheating adhesive; suction cups with rubber seals and a rigid straightedge reduce stretch during positioning, while a 3″ seam roller helps seal edges on frosted or perforated films-test on a scrap piece first to set technique and tool spacing.
Step-by-Step Installation Process
You’ll follow a repeatable sequence: measure precisely, clean thoroughly, align using marks, apply with the hinge or wet method, squeegee from center outward, trim edges, then inspect and cure for 24-48 hours; for cling-specific tips see How to Install Window Clings | Support.
Step Overview
| Measure | Top/mid/bottom – use smallest dimension; mark center and 2 offset guides. |
| Clean | Isopropyl alcohol 70%+, lint-free cloth, remove old adhesive; dry 10-15 min. |
| Align | Use 2-3 hinge tape points or wet-spray alignment for perforated film. |
| Apply | Squeegee center→edges with 3-6 overlapping passes; maintain 45° angle. |
| Trim & Inspect | Use razor for flush edges; check for bubbles and lift edges if needed. |
| Cure | Allow adhesive to set 24-48 hours; avoid heavy cleaning for 72 hours. |
Surface Cleaning and Preparation
You should degrease with 70% isopropyl alcohol, wipe with a lint-free cloth, and remove stickers or old adhesive with a plastic scraper or 3M adhesive remover; for low-energy coatings apply a primer (e.g., 3M Primer 94) sparingly, let it flash 5-10 minutes, and ensure surface temperature sits between 50-90°F with humidity under 70% before proceeding.
Positioning and Adhering the Graphic
Start by marking the center and two vertical guides, then use the hinge method-tape the top edge with 1″ masking tape, pivot the graphic down, peel backing gradually while squeegeeing from center outward; for large graphics use two installers to keep tension even and make 3-6 squeegee passes per 12″ width to lock adhesive.
For wet applications mix a slip solution (about 1 oz mild dish soap per gallon of water), spray both glass and adhesive side, position the graphic, then squeegee excess fluid toward the nearest edge; puncture only persistent bubbles with a 0.5-1 mm pin and press out-avoid excessive heat, but a warm (not hot) hair dryer at 100-120°F helps conform vinyl around slight curves and speeds tack-up in cooler environments.
Post-Installation Care
After installation, control the environment so adhesives and inks can stabilize: keep temperatures between 60-80°F (16-27°C) and relative humidity near 40-60%, and shield the glass from direct spray, heavy condensation or strong winds for 48-72 hours. You should restrict foot traffic that could rub edges and avoid cleaning for at least 48 hours; full adhesive bond typically develops within 72 hours, while some dimensional changes can continue for several days depending on the film type.
Curing Time and Drying
Curing varies by material: cast vinyl generally stabilizes faster-expect practical dimensional stability in 24-48 hours-while calendered films can continue to relax for up to 7 days and may show minor shrinkage in heat. Adhesive bond strength typically reaches working levels in 48-72 hours at ~21°C (70°F). If you need to accelerate drying, use controlled heat (do not exceed 60°C on the face film) and test a small area to avoid distortion or print damage.
Maintaining the Graphic
After curing, clean with a mild dish soap solution (about 1-2% soap in water) and a soft microfiber cloth, rinsing thoroughly and squeegeeing dry to prevent streaks; avoid ammonia-based or solvent cleaners and abrasive pads. For high-touch storefronts clean weekly and for lower-traffic locations clean monthly. If graffiti occurs use an approved graffiti remover tested in an inconspicuous spot before full application.
Inspect edges at 24 and 72 hours, then weekly for the first month; if you notice lifting, press down and squeegee the area, or apply a compatible acrylic seam adhesive or seam sealer designed for vinyl. Consider a UV overlaminate to extend life-cast vinyl with laminate often lasts 7-10 years in moderate sun, whereas unlaminated or calendared films may decline to 3-5 years depending on exposure-and schedule seasonal inspections to catch edge failure early.
Common Mistakes to Avoid
Missteps often increase rework: common errors like misalignment, trapped air, contaminated adhesive, and improper trimming raise rework rates by 15-30% on commercial installs. You should track defects-one installer’s audit of 50 storefront jobs found 40% needed edge repairs within 7 days when solvent cleaning was skipped. Prevent problems by confirming glass temperature (10-30°C), using clear alignment marks, and doing a final lint-free wipe just before application.
Misalignment Issues
Small offsets become obvious on large graphics; a 3 mm shift across a 1.5 m panel is visible to most viewers. You should mark centerlines and edge registration points every 300-500 mm, use a laser level or plumb line, and apply the hinge method so the graphic sits perfectly before full adhesion. If you must trim, leave no more than 1-2 mm overlap to avoid exposing raw edges.
Inadequate Surface Preparation
Surface contamination causes lifting and bubbling: oils, silicone, and old adhesive reduce bond strength dramatically. You should degrease with 70% isopropyl alcohol using a lint-free cloth, allow a 30-60 second flash-off, and perform a 50×50 mm adhesion test patch. Install only when glass is within 10-30°C and ambient humidity is under ~80% to ensure consistent tack.
When residue persists, remove old adhesive with a plastic scraper, then apply an adhesive remover (e.g., 3M Citrus or similar) and re-wipe with IPA. Use a heat gun at 40-60°C to soften stubborn deposits-avoid overheating that can fracture laminated glass. Finish with a final tack test and, if sealants were recently applied, wait up to 24 hours for full cure before mounting the graphic.
Conclusion
Considering all points you should prepare the surface, measure and mark precisely, wet-apply or dry-apply as appropriate, position the graphic with alignment guides, squeegee from center outward to remove bubbles, trim excess, and allow adequate curing time; perform a final inspection and touch up edges if needed to ensure a durable, professional finish.
FAQ
Q: What tools and materials do I need for a successful window graphic installation?
A: Gather: the printed vinyl or decal, a clean spray bottle with a slip solution (water + a few drops of mild dish soap) for wet installs, isopropyl alcohol (70%+) and lint-free cloths for final cleaning, a 6-12″ squeegee with felt edge, masking/painter’s tape, measuring tape and a level or laser level, a sharp snap-off utility knife with new blades, a straightedge for trimming, a heat gun or hair dryer (for conforming and removing wrinkles), gloves, and a ladder or platform if needed for height. Also have an adhesive remover or citrus-based cleaner for residue and a clean bucket of water for rinsing tools.
Q: How should I prepare the glass before installing the graphic?
A: Remove loose dirt and dust with a soft brush or dry microfiber, then wash the glass with mild detergent and water to remove film. Wipe the area with isopropyl alcohol on a lint-free cloth to strip oils and residues, and let it fully air-dry. Inspect for cracks, sealant gaps, or loose window treatments that could interfere with adhesion. Mask off and protect nearby surfaces and ensure the ambient temperature is within the vinyl manufacturer’s recommended range (typically 50-90°F / 10-32°C).
Q: How do I measure and position the graphic accurately on the window?
A: Measure the window width and height and mark centerlines with light masking tape. Hold the graphic up (or use a second person) and align the graphic’s center to the window centerline; use a level to ensure straightness. For larger pieces, use temporary registration marks on the backing and corresponding marks on the glass. If installing multiple panels, lay them out on the ground first, mark edge overlaps and position guides on the glass so seams will align evenly.
Q: What are the step-by-step application techniques for wet and dry installation methods?
A: Dry method: peel backing a few inches at a time, anchor the top edge to the glass with tape or by hand, smooth downward and outward with the squeegee in overlapping strokes to push air out, continue peeling and squeegeeing until fully applied, then trim excess. Wet method: spray the glass generously with slip solution, peel backing and spray the adhesive side lightly, place the graphic onto the wet glass, slide into final position, squeegee excess solution and air from the center outward in overlapping passes, lift edges as needed to remove trapped water, then wait recommended dwell time before final tacking (often 24-72 hours) for permanent adhesion. For large graphics use the hinge method: tape one edge as a hinge, inspect alignment, then lift and apply progressively while squeegeeing. Use heat sparingly to conform vinyl around frames and to relax minor wrinkles.
Q: How do I finish the installation and deal with bubbles, seams, and future maintenance or removal?
A: For small bubbles, squeegee toward the nearest edge; for pinholes, prick with a fine needle and press solution out. For seams, butt edges flush or overlap slightly per manufacturer guidance and use a seam roller if provided. Trim excess with a fresh blade and straightedge. Allow wet-applied graphics to cure before cleaning; clean gently with mild soap and water thereafter. To remove, heat the graphic to soften the adhesive and peel at a low angle; remove residue with adhesive remover and clean the glass with isopropyl alcohol. Store removed graphics flat or rolled per supplier instructions if planning reuse.