
Over time, sign installations commonly suffer from misalignment, inadequate anchoring, weather damage, fading, and electrical faults; you can fix these on your signs by re-leveling and aligning, upgrading anchors and foundations, applying proper sealing and UV-resistant materials, replacing damaged components, and engaging licensed electricians for wiring and permitting, while instituting routine inspections and maintenance schedules to prevent recurrence.
Key Takeaways:
- Substrate and structural mismatch – inspect wall/structure, use appropriate blocking or backing, select anchors and reinforcement rated for the substrate and sign weight; consult an engineer for large or cantilevered signs.
- Wrong or inadequate fasteners – choose stainless or corrosion-resistant anchors, use through-bolts or epoxy-set anchors where needed, size fasteners for wind and shear loads, and install washers and locknuts to prevent pull-through.
- Leveling, layout, and mounting errors – create full-scale templates, use laser levels and plumb lines, pre-drill pilot holes, and install shims or adjustable brackets to ensure straight, even placement.
- Water ingress and corrosion problems – design for drainage and ventilation, use gaskets and sealants, include weep holes or flashing, and select weatherproof materials and coatings to prevent rot and electrical failure.
- Electrical, illumination, and code noncompliance – plan conduit/j-box access, use weatherproof connectors and GFCI/grounding per NEC/local codes, label circuits, test lighting and wiring before final sealing, and obtain required permits/inspections.
Common Sign Installation Problems
You’ll see recurring failures from misalignment, improper fastening, water ingress, substrate mismatch and electrical faults. Misalignment and fastening mistakes alone often drive most on-site reworks; on a 100-site rollout installers reported 15-25% rework rates tied to those causes. You should treat tolerance specs (commonly ±3-5 mm), correct anchor selection and environmental exposure controls as primary levers to reduce long-term failures.
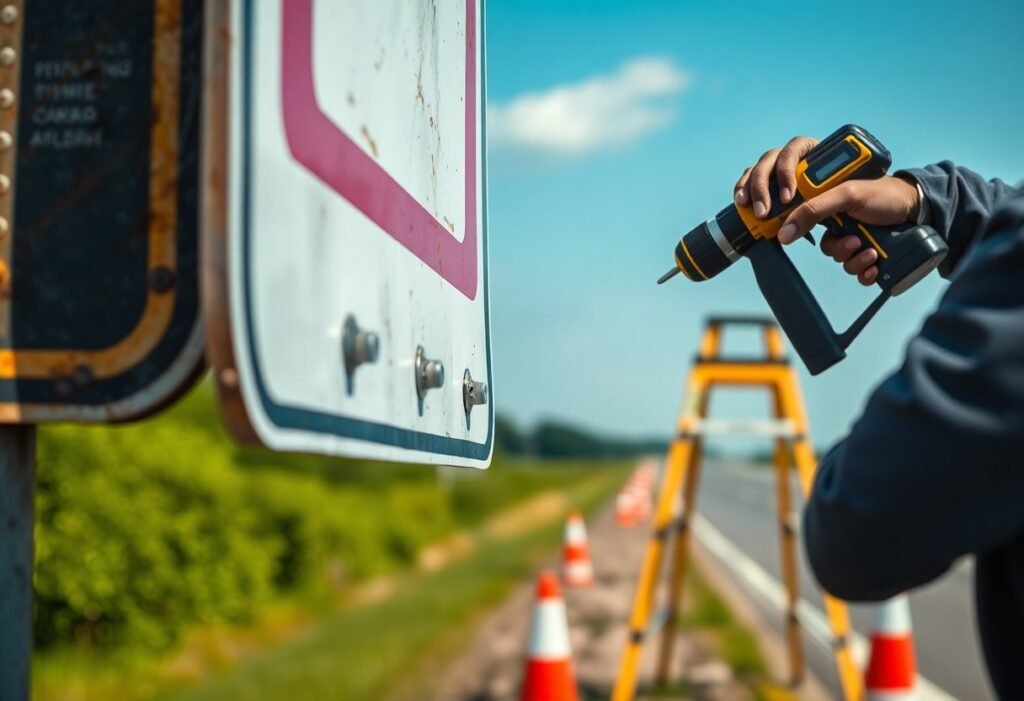
Misalignment Issues
When layout, shims or templates are off, channel letters and panel signs can appear crooked even if structurally sound. Gaps beyond ±3-5 mm produce visible shadowing and uneven reveals; thermal expansion and substrate movement compound errors over time. Use laser levels, rigid jigs, datum points and verify with a template at multiple distances-at 10 m a 5 mm shift is perceptible to most viewers.
Improper Fastening
Wrong anchor type, insufficient embedment or improperly torqued fasteners lead to loosening, pull-out or shear failure under wind and vibration. Corrosion in coastal sites and missing backing plates further reduce capacity, so anchors must match substrate and load conditions to meet code and manufacturer ratings.
To fix improper fastening, select anchors rated for the substrate and expected loads, use stainless or coated hardware in corrosive environments, and install backing plates for thin panels. Follow manufacturer embedment depth (for example, 10 mm anchors often use ~50-75 mm embedment in masonry), torque to spec, and perform sample pull-tests (1-2 kN range as a verification, adjusted to design loads). Schedule annual inspections and replace any degraded hardware promptly.
Weather-Related Challenges
Weather often magnifies installation faults: wind, rain, freeze-thaw and UV each exploit gaps, weak anchors or incompatible materials. You should plan for local extremes (use ASCE/local wind maps and rainfall statistics), specify IP/NEMA ratings for electrical signs, and schedule inspections quarterly and after storms over 50 mph. Practical fixes include aerodynamic profiles, drainage channels, corrosion-resistant hardware and design details that shed water and limit ponding to prevent accelerated failure.
Wind Damage
High winds create uplift, overturning and cyclic fatigue; you must design to published wind loads (ASCE 7 or local code) and test details. For many commercial signs assume gusts up to 90 mph in exposed zones and use through-bolts (1/2″ / M12 stainless), backing plates, shear-rated anchors and welded bracing where needed. Add safety cables sized at 2× sign weight, torque fasteners to spec, and verify anchor pullout capacities in the actual substrate.
Rain and Moisture Concerns
Water ingress causes delamination, electrical shorts and substrate rot; you should use continuous gaskets, 6-10 mm silicone beads in joints, and IP65-rated enclosures for electrics. Design 1-2° slopes and weep/drain holes to avoid standing water, choose 316 stainless or properly coated metals in coastal or high-humidity sites, and inspect seals annually-seal failure often appears within 12-24 months if wrong materials were used.
For deeper protection employ closed-cell foam tape at panel joints, overlapping seams by at least 50 mm, and use neutral-cure silicone with a 20-25 year UV lifespan. Test assemblies with a 15-30 minute water spray or hose test and monitor after heavy rains; a Seattle case showed galvanized fasteners corroded in 24 months, but switching to 316 stainless and continuous gasketing stopped repeat failures.
Material Selection Mistakes
Choosing improper materials shortens service life: for example, using 304 stainless in coastal sites can lead to pitting within years compared with 316, and non-UV-stable acrylic faces can yellow after 5-8 years. You should match material to exposure, substrate and mounting method; consult case studies such as Common Business Sign Repair Issues and How to Fix Them for repair patterns that reveal frequent selection errors.
Unsuitable Materials for Environment
In marine, high-humidity or industrial atmospheres, specify 316 stainless or powder-coated aluminum with a marine-grade topcoat; 304 stainless or plain steel can corrode quickly. UV-heavy sites need fade-resistant inks and acrylics rated for 8-10 years; otherwise colors shift within 3-5 years. You should review local corrosion maps and choose finishes with proven accelerated-weathering test results.
Inadequate Durability
Designs that ignore mechanical stresses fail early: undersized fasteners, thin metal gauges and single-point mounts can’t handle wind loads-many jurisdictions require designs for 90-120 mph winds. You ought to specify anchor capacities, thicker gauges (e.g., 0.08-0.12″ for aluminum faces) and grade-appropriate bolts (Grade 8 or 316 stainless) to prevent shear and fatigue failures.
Mitigate durability issues by calculating wind uplift from local wind speed and sign area, sizing anchors with a 2× safety factor and torquing bolts to spec. Add EPDM gaskets and drainage weep holes to avoid trapped moisture, use coatings with 2-5 mils DFT or anodizing of 10-25 µm, and inspect your signs every 6-12 months to catch loosening or coating breakdown early.
Lack of Proper Permits
Failing to secure the right permits creates avoidable setbacks: you often need zoning clearance, a building permit and an electrical permit for illuminated or roof‑mounted signs, with municipal reviews commonly taking 2-8 weeks and mandatory inspections before final approval.
Understanding Local Regulations
Check your municipality’s sign code and zoning district first-maximum area, height, setbacks, illumination hours and material restrictions vary widely; you may also need a historic‑district approval, a licensed engineer’s wind‑load calculations and compliance with the NEC for electrical work.
Consequences of Non-compliance
Installing without permits can trigger stop‑work orders, fines (commonly $100-$5,000), and expedited removal or abatement directives that require action within 7-30 days, while insurance claims related to the sign may be denied and you can incur legal fees.
Practically, expect cost and time blowouts: removal, reapplication fees, redesigns and repeat inspections often add 50-200% to original costs and can delay opening or advertising by 2-12 weeks; unresolved violations may lead to liens or injunctions against your property.
Accessibility and Visibility Concerns
When you plan signage, accessibility and sightlines determine real-world effectiveness: ADA tactile signs must have tactile character baselines 48-60 inches above the finished floor, and legible copy follows the rule of 1 inch of letter height per 10 feet of viewing distance; failing these leads to legal complaints, missed wayfinding and lost sales, so audit mounting heights, contrast and sight triangles before final install.
Height and Placement Issues
You often see signs mounted too low (under 48″) or too high (above 72″), which breaks ADA clearances and reduces readability; for directional signs place tactile elements 48-60″ high, ensure visual signs’ centerlines suit average sightlines, and size letters using 1″ per 10′ viewing distance while checking door swings, ramps and pedestrian flows.
Obstructions Blocking View
Branches, awnings, delivery vehicles or temporary displays can obscure a sign during peak hours; you must assess sightlines from primary pedestrian and vehicular approaches, apply minimum clear sight triangles (commonly 10-15 ft at intersections), and relocate, raise or redesign signs to preserve unobstructed visibility.
To resolve obstructions, set a maintenance schedule (tree trimming quarterly, vendor placement reviews), specify setbacks of 3-5 ft from curbs where possible, and use standoffs (18-36″) or larger type (increase letter height ~25%) plus downward lighting and high-contrast finishes to restore legibility from typical approach distances of 50-100 ft.
Maintenance Oversights
Neglected maintenance is a leading cause of premature sign failure; you should inspect at least monthly for high-exposure sites, quarterly for most retail façades and biannually for sheltered installations. Track corrosion, sealant shrinkage, and water ingress-one case study found a channel letter collapse after three winters due to rusted anchors and blocked drainage. Use condition logs and photos so you can correlate wear with exposure and adjust your maintenance cadence accordingly.
Regular Inspection Protocols
Develop a 10-point checklist that you run through each visit: anchor torque, fastener corrosion, sealant continuity, level/plumb, substrate movement, electrical connections, lamp output, face damage, mounting backing and drainage. Carry a torque wrench and follow manufacturer specs rather than guessing values, log measured lamp lumen or lux against original spec, and keep a dated photo record to spot trends over time.
Cleaning and Repair Best Practices
Use pH-neutral detergents and soft brushes for painted, acrylic or vinyl faces; avoid solvents like acetone on vinyl graphics. Limit pressure washing to under ~800 psi and a wide-angle nozzle to prevent delamination. Replace gaskets and seals proactively, use corrosion-resistant fasteners (316 stainless for coastal, hot-dip galvanized inland) and always isolate electrical circuits before any repair.
Start repairs with a test patch and document materials used. For metal corrosion, remove rust to bright metal, apply a zinc-rich primer then two finish coats of exterior polyurethane; allow proper cure times listed by the manufacturer. For illuminated signs, replace LED modules when output drops ~30% versus new, and refit foam or neoprene gaskets to restore ingress protection to original IP rating.
To wrap up
Considering all points, you should address common sign installation problems by ensuring the substrate is sound and using the correct anchors for wind loads, leveling and aligning your sign, protecting electrical connections and using weatherproof seals, choosing corrosion-resistant fasteners and coatings, securing permits and following code, and planning drainage and maintenance to prevent rot and fading. When issues arise, inspect your mount, replace damaged hardware, re-seal joints, and consult an electrician or engineer for structural or wiring faults.
FAQ
Q: What causes signs to pull away from the mounting surface or fall off, and how do you fix it?
A: Common causes are poor substrate condition, wrong fastener type, undersized anchors, or improper adhesives. Fix by inspecting the substrate (concrete, masonry, wood, metal) and repair or reinforce it; choose anchors rated for the substrate and sign weight (wedge anchors, sleeve anchors, stainless-steel lag bolts, toggle bolts for hollow walls); use backing plates or mounting rails to spread load; if adhesives are used, select structural adhesives rated for the materials and environmental conditions and follow surface preparation (clean, abrade, prime); for large or high-wind signs consult a structural engineer and use mechanical attachment as the primary support.
Q: Why do signs sag, buckle, or warp after installation and how can I prevent or correct that?
A: Sagging and warping come from material flex under load, thermal expansion, insufficient framing, or moisture intrusion. Prevent by using properly stiffened panels (ribs, channel framing, or haunches) and selecting materials suited to the span and climate (aluminum composite with internal stiffeners for wide spans); allow for thermal movement with elongated mounting slots or expansion joints; seal and flash edges to prevent water ingress; if a sign is already warped, remove and repair or replace the substrate or add a reinforcing frame and re-mount using correct fastener pattern and spacing.
Q: Why is my illuminated sign flickering, dimming or failing, and what repairs are needed?
A: Flicker and failure usually stem from power-supply/driver issues, loose or corroded wiring, improper LED driver sizing, or overheating. Troubleshoot by verifying proper voltage and polarity with a multimeter, checking connections and terminal blocks for corrosion, and inspecting the driver for signs of heat damage; replace with a correctly rated LED driver that matches the LED string and includes surge protection; improve ventilation or add thermal management (heatsinks) to reduce overheating; use waterproof connectors and seal junctions in outdoor or damp locations.
Q: How do I fix alignment, level, or visual-positioning problems after mounting a sign?
A: Misalignment comes from inadequate layout, poor measurement, or uneven substrates. Correct by removing the sign if necessary and re-marking the layout using a laser level or plumb line and full-size templates; install adjustable mounting brackets or shims to compensate for uneven surfaces; drill pilot holes and use a jig or spacer blocks to maintain consistent offsets; for channel or dimensional letters install alignment rails or horizontal templates so each element can be positioned precisely.
Q: What weather- and wind-related issues affect signs and how do I make them durable?
A: Wind loading, corrosion, UV degradation, and water infiltration are common. Address them by designing to local wind-load codes and using appropriate anchors and structural supports sized for wind forces; use corrosion-resistant fasteners (316 stainless or hot-dip galvanized) and marine-grade hardware in coastal areas; apply UV-stable finishes and protective coatings; seal edges and penetrations with appropriate sealants and flashing to prevent water ingress; schedule regular inspections to catch loose fasteners, sealant failures, or metal fatigue and repair promptly.