
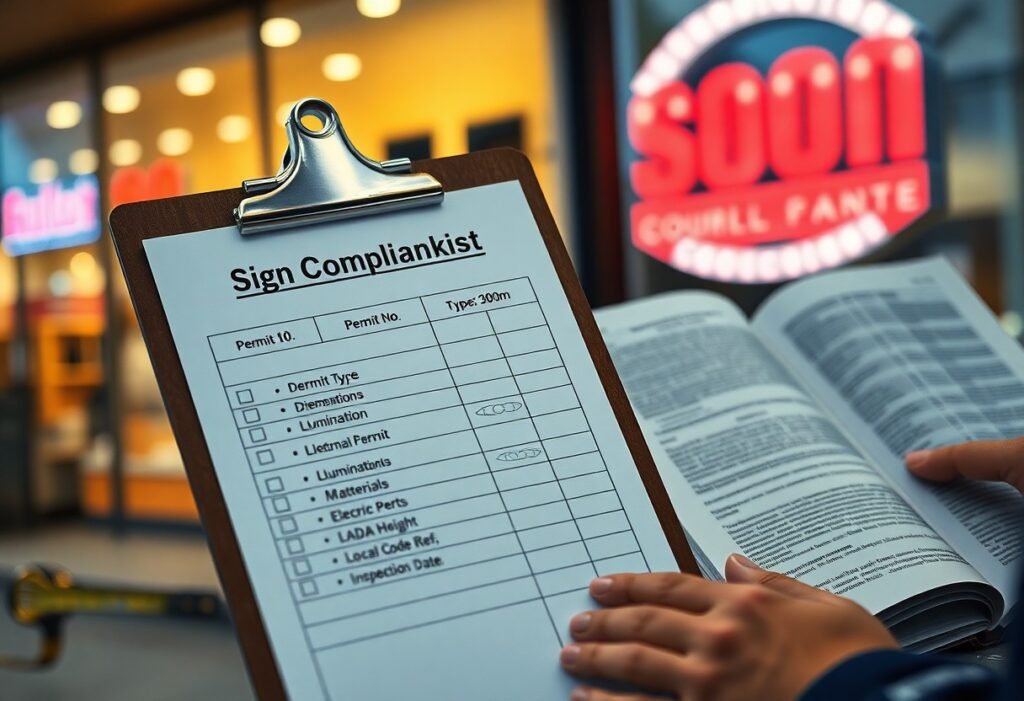
Most of your sign compliance checklist should include local permitting and zoning rules, allowable size and placement, illumination and electrical safety, materials and structural standards, ADA and accessibility requirements, setback and sightline restrictions, inspections and maintenance schedules, insurance and liability coverage, and documentation of approvals to ensure you meet regulations and avoid fines.
Key Takeaways:
- Permits and local-code compliance – verify required permits, municipal sign ordinances, historic-district rules and obtain variances as needed.
- Zoning, size and placement limits – confirm allowed sign types, maximum dimensions, height, setbacks and property-line restrictions.
- Electrical, structural and illumination safety – use licensed electricians, ensure proper wiring/grounding, UL-listed components and safe lighting levels.
- Accessibility, legibility and sightlines – meet ADA entry signage rules, use sufficient contrast and size, and avoid blocking pedestrian or driver sightlines.
- Maintenance, inspections and documentation – schedule inspections, keep maintenance logs and photos, retain permits/approvals and verify insurance covers signage risks.
Importance of Sign Compliance
Failing to follow sign codes can cost you beyond aesthetics: noncompliant signs often trigger permit rejections, removal orders, or fines that municipalities commonly set between $50 and $1,000 per violation, and can delay openings by weeks while you rework designs. You should prioritize ADA tactile/Braille requirements, zoning size and setback limits, electrical permits for illuminated signs, and a documented approval trail to avoid costly interruptions and legal exposure.
Legal Requirements
You must meet federal, state, and local rules: ADA requires tactile and Braille signage at permanent rooms and exits, ANSI/ADA standards guide mounting heights, and zoning codes dictate sign area, height, and setbacks. Permit applications typically need scaled drawings, engineering for large signs, and electrical inspections for illumination; missing any item can halt installation or prompt removal orders and civil enforcement by local code officers.
Brand Integrity
Consistent signage preserves your brand and customer recognition, so you should enforce logo proportions, color codes, and legibility standards across locations. National chains use style guides and approved sign kits to maintain uniformity; you can mirror that approach with a master template, approved vendors, and a single-source color system to keep your storefronts instantly identifiable and professional.
For practical control, adopt measurable rules: use the 1 inch of letter height per 10 feet of expected viewing distance, set minimum clear space at 20% of logo height, and specify Pantone/CMYK values for all colors. Schedule quarterly inspections, replace illumination modules every 2-3 years, and require vendor mockups and permit-ready CAD files before production. Many operators standardize sign kits across multiple sites to cut costs and speed approvals, while retaining local permit compliance through a central checklist.
Types of Signs Requiring Compliance
Across property types you must treat signs differently: storefront signs, freestanding/pylon signs, temporary banners, directional/wayfinding signs and illuminated displays each trigger different rules, permits and technical standards. Include site-plan setbacks, structural engineering for tall signs, electrical permits for illumination, and ADA requirements for interior wayfinding; many local codes set area limits (commonly 25-100 ft²) and height caps (often 20-35 ft). Use the table below to map each type to the usual compliance focus.
| Exterior storefront | Permits, max area often 25-100 ft², mounting height, awning rules |
| Freestanding / pylon | Height limits often 20-35 ft, foundation/engineering review, sight-line setbacks |
| Temporary / banners | Time-limited permits (commonly 30-90 days), wind-load and attachment standards |
| Directional / wayfinding | ADA tactile/Braille, mounting centerline 48-60 in, contrast and pictogram specs |
| Illuminated / neon | Electrical permits, lumen/brightness limits, hours-of-operation and energy code |
- Confirm permit type and submittal checklist for each sign category before ordering fabrication.
- Verify size and height caps on your parcel; many zones limit wall signs by linear frontage.
- Check structural and electrical requirements for pylon or illuminated signs to avoid rework.
- Ensure interior wayfinding meets tactile, Braille and mounting rules under ADA standards.
- Account for historic-district overlays or design-review boards that impose material and color limits.
Exterior Signs
For exterior signs you need to evaluate zoning, visibility and engineering: channel letters and cabinet signs commonly require electrical permits and cut-sheets, while freestanding signs usually need stamped foundation plans; many cities cap wall sign area relative to façade frontage (examples range 1-2 sq ft per linear foot) and restrict pole heights to 20-35 feet, so factor permitting timelines and contractor lead times into your rollout.
Interior Signs
When you install interior signage prioritize ADA compliance, egress safety and finish-material rules: room identification signs must have raised characters 5/8-2 inches high with Grade 2 Braille, mounted so the tactile text centerline sits 48-60 inches above the finished floor, while exit signs require illumination and emergency power per building-code guidance.
If your interior signs include illuminated elements or digital displays, coordinate with your electrician and fire-safety plan early; exit signage and emergency lighting typically require connection to emergency circuits with 90-minute backup in many jurisdictions, and combustible materials may be restricted near means of egress-so you should submit fixture specs and mounting details with your permit packet.
Recognizing these categories helps you prioritize permits, allocate budget for engineering or electrical work, and schedule inspections so your signs go up without delays.
Elements of a Sign Compliance Checklist
Audit each element against local code: setbacks, maximum area, height limits, illumination rules, and material specifications. You should map sign dimensions to building frontage, confirm permit categories (temporary vs. permanent), and note historic-district overlays; for example, many downtown ordinances cap freestanding signs at 6-8 ft tall and wall signs at 10% of façade area.
Size and Dimensions
Measure sign area using the smallest surrounding rectangle and compare to frontage-based limits (commonly 1-1.5 ft² per linear foot) or percentage-of-facade caps. You should also verify maximum height, setback from property line or sidewalk (often 2-5 ft minimum), and clearance over sidewalks-typically 8-10 ft for pedestrian safety.
Font and Legibility
Specify letter height, stroke width, and contrast: apply the 1 inch per 10 feet readability rule for viewing distance, prefer sans‑serif faces for quick recognition, and avoid decorative scripts for primary messaging. You should also set minimum character height for sightlines and limit word count to keep copy scannable.
For compliance and accessibility, ensure tactile signage meets ADA character height (typically 5/8″ to 2″) and non‑glare finish, and target at least 70% luminance contrast between text and background. You should control kerning and stroke width so letters remain legible at scale-aim for stroke widths ~10-20% of uppercase height-and test mockups at full size from key sightlines.
Materials Used
Document material type, finish, and fire/safety ratings: common choices include powder‑coated aluminum for frames, acrylic or polycarbonate faces for illuminated signs, and high‑density urethane or hardwoods for routed signage. You should note UV resistance, warranty periods, and compatibility with mounting and electrical attachments.
Assess expected lifespan and maintenance: aluminum and ACM composites often last 15-25 years with low upkeep, acrylic faces typically show weathering after 5-10 years, and wood requires yearly sealing in exposed locations. You should also verify manufacturer corrosion ratings, grounding for metal signs, and whether materials meet local fire code or historic‑district material guidelines.
Lighting and Illumination
Record lighting type (internal LED channel letters, backlit cabinet, or external gooseneck), mounting, control (timers/dimmers), and shielding to prevent glare. You should confirm compliance with local light‑spill and fixture cutoff rules and note any curfews or automatic dimming requirements imposed by the municipality.
Evaluate brightness and color temperature: LEDs are standard for efficiency and controllability, and many jurisdictions cap digital sign brightness-commonly to 200-500 nits at night-while restricting color/flash rates. You should document measured lux or nit values during night tests, ensure fixtures are aimed to minimize light trespass, and include specs for timers, photocells, and dimming profiles in the permit package.
Local Regulations and Permits
Confirm municipal sign ordinances for size, illumination, setback and material restrictions before budgeting or ordering fabrication; historic-district reviews often add 30-60 days and may require color samples or heritage-compatible materials. Use the Signage Checklist & Inspection Guide to checklist documents, typical fees ($25-$500) and sample drawings so your application isn’t returned for omissions.
Zoning Laws
Check how zoning districts affect allowable sign types: downtown commercial zones (C-2) commonly permit wall, blade and awning signs but cap freestanding signs at 10-15 ft or 32-100 sq ft; residential-adjacent parcels often restrict illumination and flashing elements. You should map your parcel’s zoning code section and note setback and sight-triangle rules to avoid citations or forced removal.
Permitting Processes
Prepare a permit packet with scaled site and elevation drawings, material specs, electrical permits for illumination and a photo of the proposed sign location; many jurisdictions require contractor licensure and proof of insurance. Expect review timelines of 7-30 business days for standard permits, longer for variances, and factor in permit fees when scheduling install dates.
When seeking variances or historic approvals, plan for public hearings and additional documentation-renderings, structural calculations and neighbor notifications-often extending the process 4-12 weeks. Inspections may require anchor tests or electrical sign inspections after install, and some cities issue temporary permits for up to 90 days while full approvals are processed.
Accessibility Considerations
Plan signs to serve customers with vision or mobility impairments by combining tactile elements, clear sightlines, and readable graphics; this reduces permit delays and liability while improving wayfinding for everyone. Prioritize mounting, contrast, and braille so your signage actually guides visitors rather than just decorating façades.
ADA Compliance
You must follow ADA sign specs: tactile characters between 5/8″ and 2″ high with Grade 2 Braille directly below, and tactile baselines mounted between 36″ and 48″ above the finished floor. Also use non-glare finishes, raised characters at a minimum depth, and place room/wayfinding signs on the latch side of doors to meet typical local code and federal guidelines.
Visibility for All Customers
Optimize legibility with high-contrast color combinations, simple sans-serif fonts, and letter heights sized to viewing distance-use the rule of thumb of about 1″ of letter height per 10 feet of expected viewing distance (a 6″ letter for ~60′ visibility). Maintain even illumination and non-reflective surfaces so signage reads day or night.
For example, if your storefront needs to be read from a parking lot 120 feet away, plan for roughly 12″ tall letters and backlit channel letters with diffusers to avoid hot spots; for interior directional signs keep characters within ADA tactile ranges while increasing visual size for corridor sightlines. Test mockups at full scale and from common customer vantage points before final permitting to avoid costly revisions.
Regular Maintenance and Updates
Keep your signs code-compliant and safe by building a maintenance calendar: perform inspections at least twice a year (spring and fall), test electrical and backup systems every 6-12 months, and replace lighting components based on manufacturer life ratings (LED modules ~50,000 hours). You should retain inspection logs and receipts for 3-5 years to support permit renewals and dispute resolution with inspectors.
Scheduled Inspections
Schedule thorough checks after installation, twice yearly, and following storms or construction nearby; include anchor torque, fastener corrosion, face legibility from 20-30 feet, weather seals, wiring insulation, and illumination uniformity. You can use a simple checklist and a lux meter or contractor report to document brightness and create a repair timeline tied to budget quarters.
Addressing Wear and Tear
Prioritize repairs that affect safety or code compliance: replace corroded mounts, reseal water-intruded cabinets, and swap faded vinyl or burned-out modules promptly. Typical service lifespans: exterior paint 3-7 years, vinyl graphics 3-5 years, and LED modules 5-8 years depending on daily run-hours; factor those ranges into your replacement budget.
When you address deterioration, follow a practical workflow: identify hazards, estimate costs, decide between repair or modular replacement, then hire a certified sign contractor for structural or electrical work. Use corrosion-resistant materials (aluminum, stainless fasteners), UV-stable inks, and powder-coat finishes to extend life; document each intervention and update your compliance checklist and permits if the sign’s appearance, size, or illumination changes.
Conclusion
Drawing together the key items for a sign compliance checklist helps you ensure permits, zoning approvals, size and placement limits, material and illumination standards, ADA and safety requirements, and any historic or environmental restrictions are addressed; include inspection schedules, maintenance plans, permit renewals, and documentation so you can demonstrate compliance and avoid fines while protecting brand visibility and public safety.
FAQ
Q: What items should be included on a basic sign compliance checklist for business owners?
A: A comprehensive checklist should cover: permit status (application numbers, issuance dates, and expiration dates); zoning compliance (allowed sign types, permitted areas, and setback requirements); size and area limits (maximum sign face area, height restrictions, and projection over public right-of-way); materials and construction (approved materials, fire-rating, framing and anchoring details); electrical and structural compliance (wiring permits, licensed electrician sign-off, structural calculations for wind load); illumination and lighting controls (light intensity limits, shielding, timers, and LEDs color/temperature if regulated); accessibility and readability (contrast, letter height for sightlines, tactile/Braille where required); safety and clearances (distance from sidewalks, sight triangle and vehicle sightlines); maintenance and inspection records (inspection dates, repairs, photo documentation); and insurer and liability documentation (proof of insurance and any indemnity requirements).
Q: How do I verify permit, zoning, and approval requirements before installing or altering a sign?
A: Start by checking the municipal planning or building department website for sign ordinances and zoning maps; confirm your property’s zoning designation and permitted sign types. Contact the local permitting office to determine required permits, fees, plan submission requirements, processing times, and any historic district or special overlay reviews. Obtain written confirmation of approvals and keep copies of stamped plans, permit numbers, and any conditions of approval. If the property is part of an HOA or shopping center, secure written landlord or management consent and verify they do not impose more restrictive standards than the city.
Q: What are common standards for sign size, placement, and visibility that should be on the checklist?
A: Include maximum sign area and height limits, allowable projection and setback from property lines or curb, distance from intersections and sight triangles, required clearances above sidewalks and from vehicle lanes, permitted number of wall, freestanding and canopy signs per frontage, and rules for roof signs. Add checks for orientation and contrast to ensure visibility from intended approaches, restrictions on digital or animated content, and proximity limits to neighboring signs. Confirm measurement methods (e.g., overall sign face vs. individual panel) and any special calculation rules used by the jurisdiction.
Q: What accessibility and safety requirements should be included to meet ADA and public-safety rules?
A: Verify ADA requirements for signs that identify permanent rooms and spaces (tactile characters, Braille, mounting heights, and reach ranges), accessible route clearance under projecting signs, and sufficient visual contrast and letter heights for wayfinding signs. Check electrical and water intrusion protections for illuminated signs, breakaway/structural design for pole-mounted signs, fire safety compatibility of materials, and emergency egress visibility. Include items for pedestrian safety such as avoiding obstructions on sidewalks, maintaining sightlines for pedestrians and drivers, and meeting any local requirements for anti-glare or dimming controls at night.
Q: What maintenance, inspection, and recordkeeping practices should a business owner include on the sign compliance checklist?
A: Schedule regular inspections (visual monthly checks and professional inspections annually or per code), document all inspections with date-stamped photos and notes, and log repairs or replacements with vendor invoices and permits for electrical or structural work. Maintain a copy of the original approved plans, current permits, structural calculations, and electrician/installer certifications on site or in cloud storage. Include a compliance calendar for permit renewals, periodic lighting/intensity checks, paint and material condition, fastener and anchor integrity, and storm-damage inspections. Retain records for the period required by local code or business policy to support enforcement inquiries or insurance claims.